The air is getting crisp, the leaves are turning, and there's a certain kind of magic that only comes with the Halloween season. It's a time for costumes, candy, and all things spooky. But what if you could add a new, creative tradition to your festivities? Imagine gathering your friends and family for a night of crafting, creativity, and ghostly good times. That's right, we're talking about a Halloween jewelry making party.
A DIY beaded jewelry party is the perfect way to get into the spirit of the season. It’s an activity that’s fun for everyone, whether you’re a parent looking for a unique way to entertain the kids or an adult seeking a creative outlet for a ghoulish get-together. The best part? Everyone gets to take home a personalized, one-of-a-kind keepsake. This guide will walk you through everything you need to know to host an unforgettable Halloween jewelry making party for both kids and adults. We’ll cover everything from planning and supplies to themes and tips, ensuring your event is a thrilling success.
Setting the Scene: Ambiance is Everything
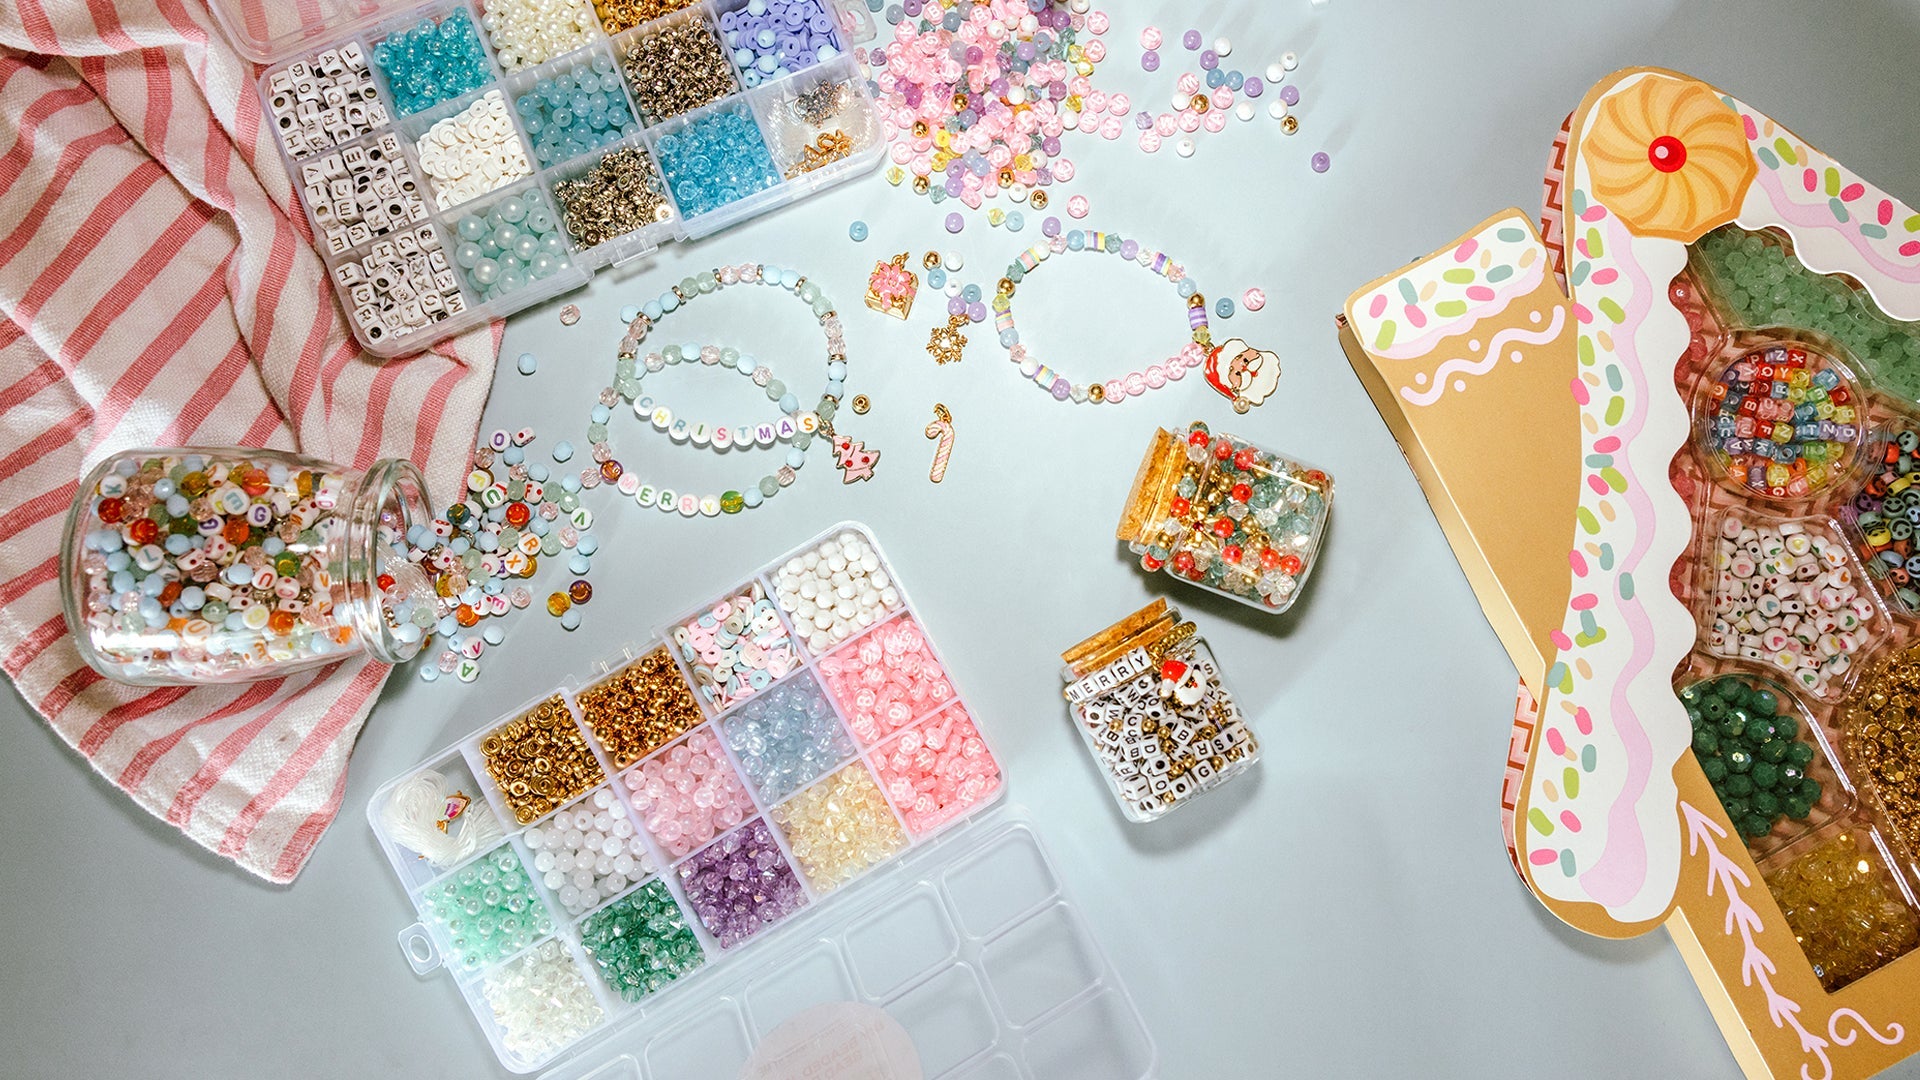
Before anyone even starts to string a bead, you need to create the right atmosphere. A great party is all about the details. For a Halloween jewelry party, think spooky but chic. Dim the lights and use candles (battery-operated for safety) to cast an eerie glow. String up some cobwebs, hang paper bats from the ceiling, and place mini pumpkins or skulls on the tables.
Don't forget the soundtrack! A playlist of classic Halloween movie scores or spooky sound effects can really set the mood. Think about having a designated "crafting station" where all the beads, tools, and supplies are neatly laid out. This makes it easy for everyone to find what they need and keeps the creative flow going.

Planning Your Guest List: Kids vs. Adults
One of the most important decisions you'll make is whether your party will be for kids, adults, or a mix of both. This choice will heavily influence the types of supplies you need and the complexity of the projects.
For the Kids:
Kids love vibrant colors, fun shapes, and simple projects they can complete quickly. Think big, easy-to-handle plastic or acrylic beads. Halloween-themed beads shaped like pumpkins, ghosts, and bats are always a hit. Use stretchy cord for bracelets, as it's the easiest for little hands to manage without any fiddly clasps. Remember, the goal for kids is less about intricate design and more about creative expression and a fun, finished product. A good rule of thumb is to have plenty of supervision and pre-cut strings to avoid frustration.
For the Adults:
Adults can handle more intricate designs and appreciate a wider variety of materials. Offer smaller glass beads, metal charms, and different types of stringing materials like beading wire or waxed cord. You can introduce more advanced techniques, such as using crimp beads, clasps, or even simple wire-wrapping. Think about offering a variety of project ideas, from simple bracelets to more complex necklaces or even earrings. The adult party can feel more like a sophisticated craft night, complete with themed cocktails or mocktails.
For a Mixed Party:
If you’re hosting a family-friendly event, the key is to have separate stations for kids and adults. Set up a "Little Ghouls" table with the larger beads and stretchy cord, and a "Witch's Workshop" table with the more advanced materials. This ensures everyone has a fun, age-appropriate experience. The adults can also help the kids with their projects, making it a great bonding activity.
Gearing Up: The Ultimate Supply Checklist
Having the right supplies is crucial for a successful party. The good news is that you don’t have to hunt down every item individually. DIY kits are a game-changer and make the process incredibly easy. Here’s a checklist of what you’ll need:
-
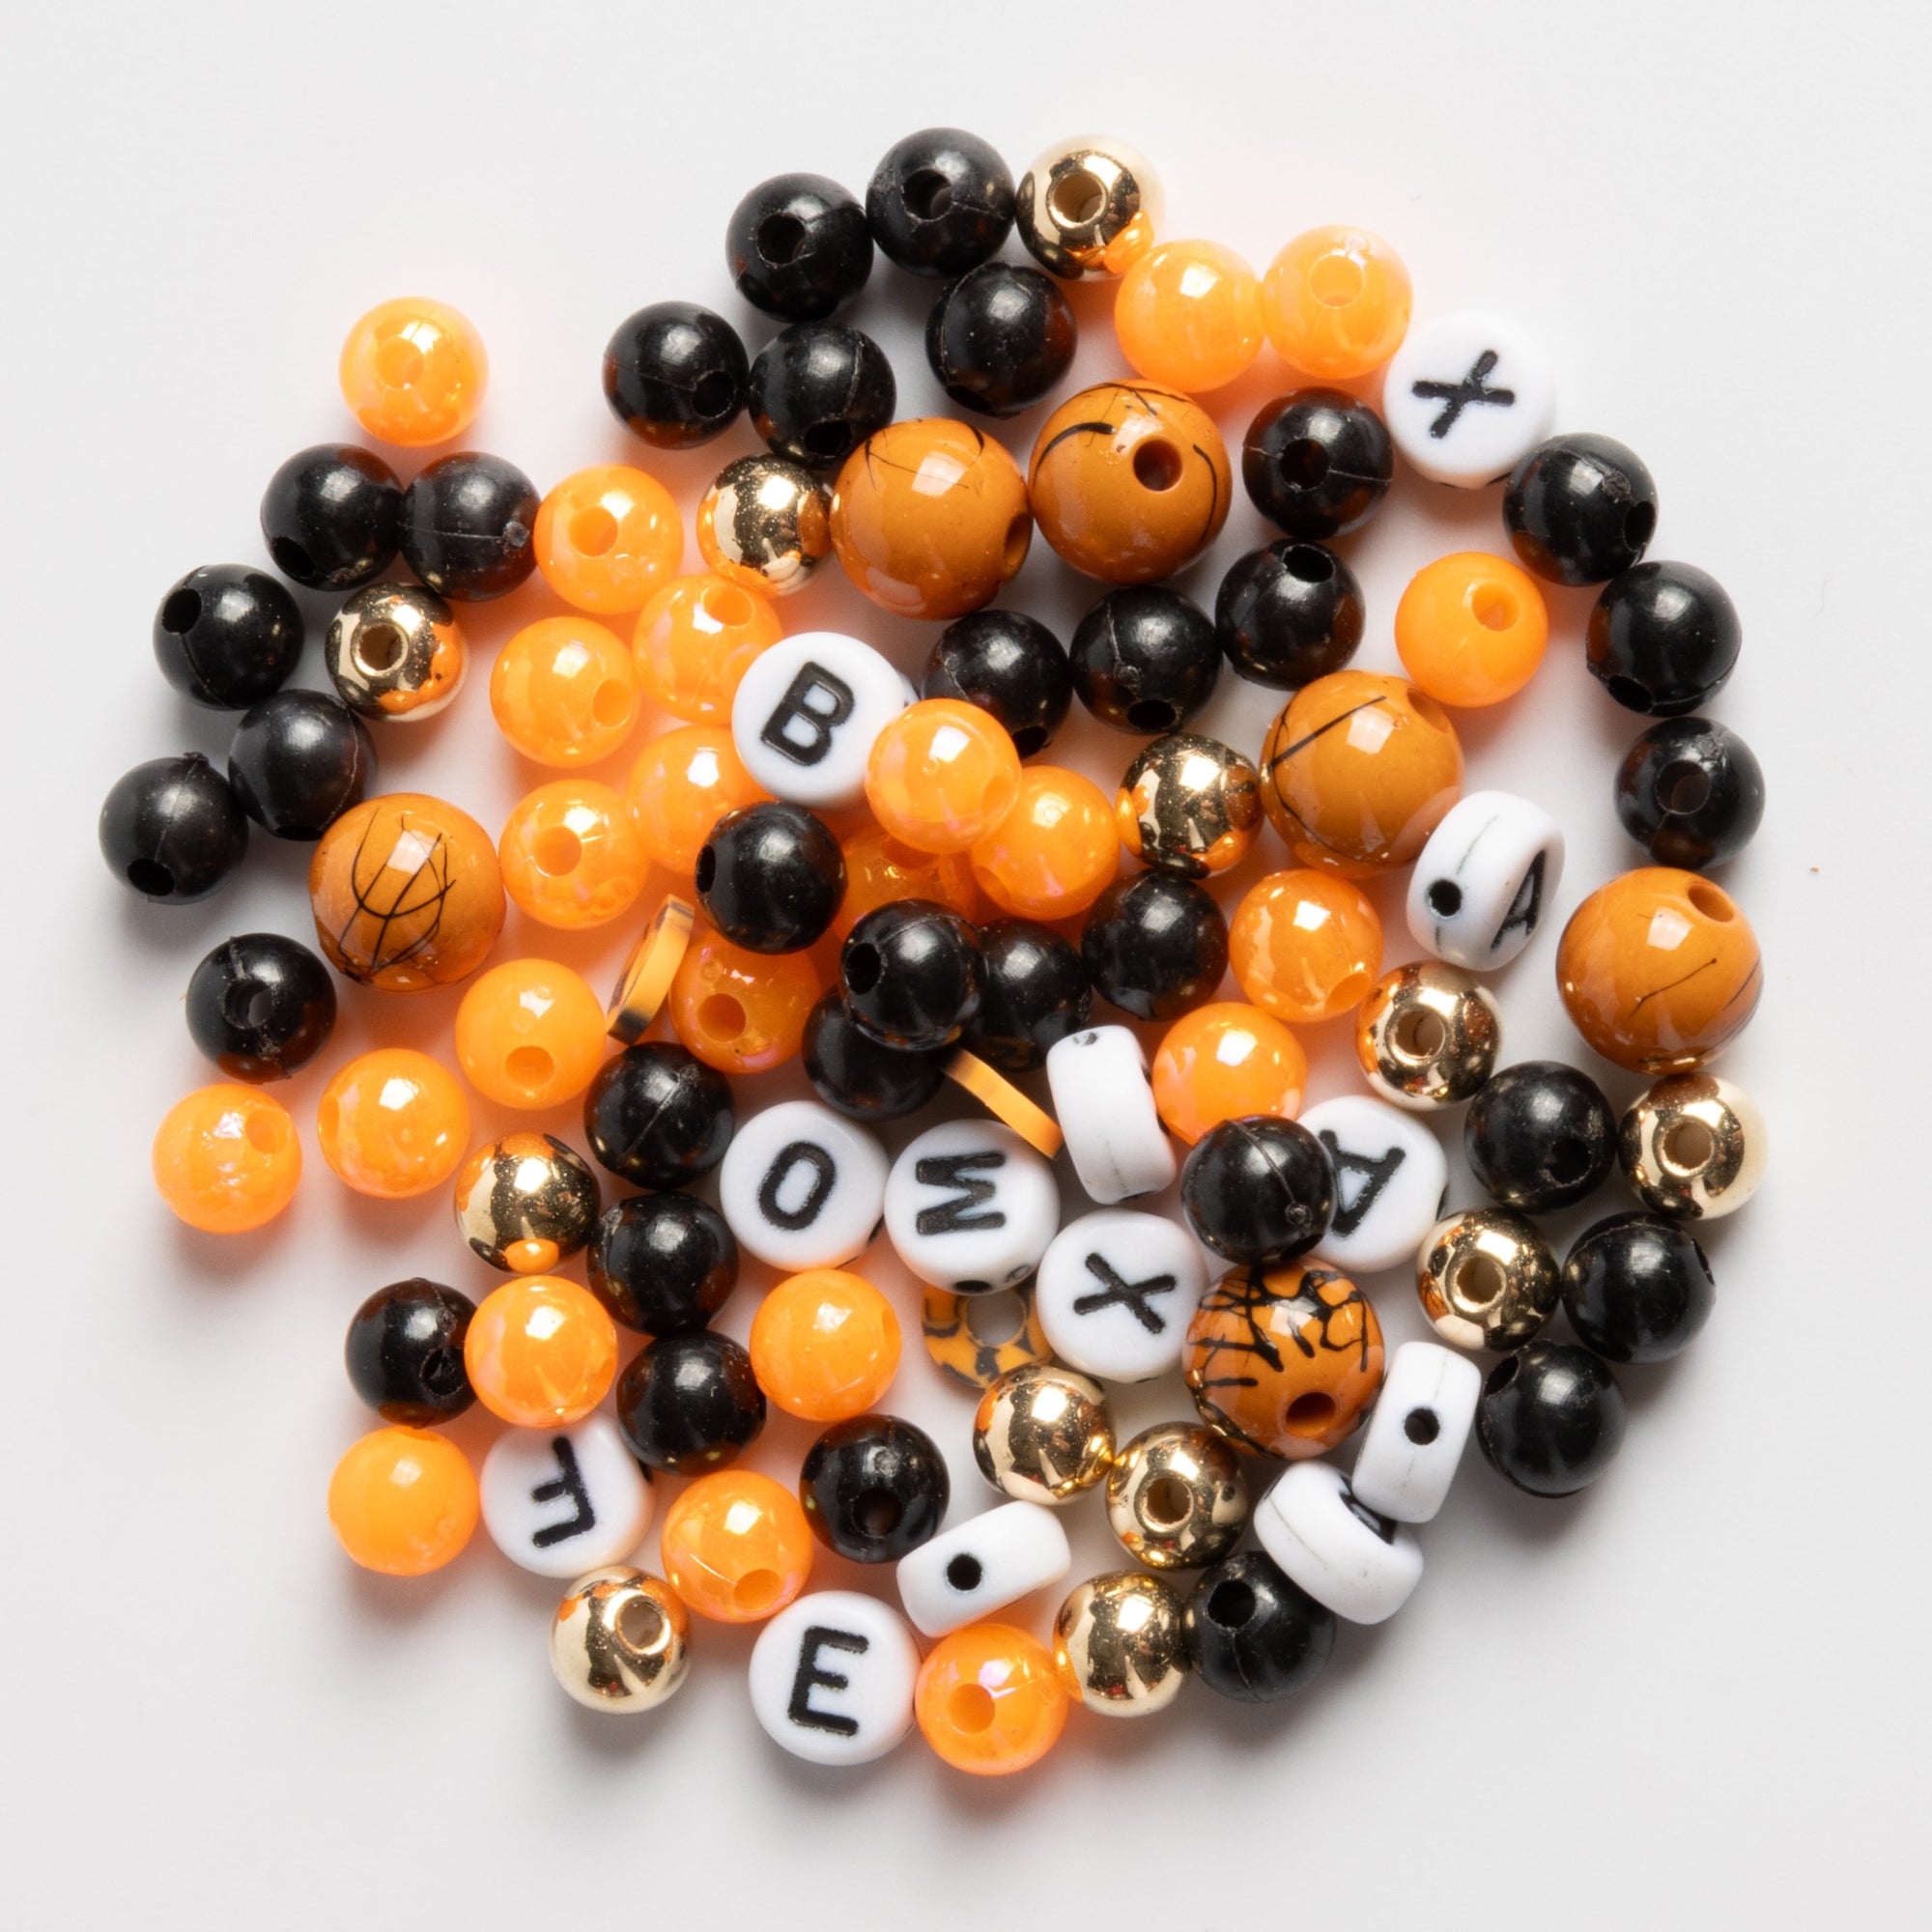
Beads: The stars of the show! Make sure you have a variety of colors, shapes, and sizes. Look for Halloween-themed beads like pumpkins, skulls, spiders, and bats. Don't forget a mix of solid colors like black, orange, purple, and green.
-
Charms: Small, decorative charms add personality and a focal point to any piece of jewelry. Think witch hats, tiny ghosts, or glow-in-the-dark stars.
-
Stringing Material: Stretchy elastic cord for bracelets is a must for both kids and adults. For more advanced projects, have some beading wire or jewelry string on hand.
-
Tools: You'll need scissors to cut the string. For adult projects, small pliers for opening and closing jump rings and attaching clasps will be useful.
-
Containers: Use small bowls or trays to keep beads organized. This prevents them from rolling off the table and getting mixed up. A bead sorting tray is a lifesaver.
-
Design Boards: A bead design board with channels is an excellent tool for adults to plan their designs before they start stringing.
-
Instructions & Inspiration: Have some sample bracelets or necklaces on display to spark creativity. You can also print out simple step-by-step instructions.
Thematic Ideas to Spark Creativity
To make your party truly memorable, lean into the Halloween theme. Here are some fun ideas to inspire your guests' creations:
-
Spooky Chic: Use black, silver, and gold beads with skull or spider charms for a more elegant, gothic look.
-
Creepy Creatures: Focus on beads shaped like eyeballs, spiders, snakes, and bats. Glow-in-the-dark beads are perfect for this theme.
-
Pumpkin Patch: A classic Halloween theme with orange and green beads, and lots of pumpkin and leaf charms.
-
Witchy Wonders: Incorporate purple, green, and black beads with witch hats, cauldron, and broomstick charms.
-
Day of the Dead: Use vibrant colors like pink, red, blue, and yellow with skull beads for a festive and colorful theme.
From Start to Finish: Hosting the Perfect Party
Your role as the host is to be a facilitator, not a dictator. Here's a simple flow for your party:
-
Welcome Guests: Greet everyone and direct them to the crafting station. Have a festive drink and snack ready.
-
Brief Introduction: Give a quick, fun introduction. Explain the different types of beads and materials available. Show off some sample pieces to get everyone excited.
-
Let the Creativity Flow: This is the time for everyone to start crafting. Circulate around the room, offering help and encouragement. For kids, you might need to help them tie knots or cut the string.
-
Show and Tell: Once everyone has finished at least one piece, have a "show and tell." It's fun to see what everyone created and admire their unique designs.
-
Party Favors: The best party favor is the jewelry everyone made themselves! However, you can also have small goodie bags with some extra beads or charms for them to take home.
Why Choose DIY Beaded Jewelry?
Compared to other Halloween party activities, DIY beaded jewelry has several advantages. It's a low-mess, highly creative activity that appeals to a wide range of ages and skill levels. Unlike pumpkin carving, it doesn't involve sharp tools, making it safer for a mixed-age group. It's also less expensive and time-consuming than a full costume contest or haunted house. Most importantly, it results in a tangible, wearable item that serves as a lasting memory of the fun time together. It’s a craft and a keepsake all in one.

The Ultimate Convenience: Shopping for Your Party
Now that you're ready to host the best Halloween party ever, you need to get your supplies. Look for pre-made DIY kits that include everything you need, from a variety of beads and charms to the stringing material and simple instructions. These kits take the guesswork out of planning and ensure you have a cohesive set of materials that fit the theme.
Ready to get started? We have the perfect solution for your Halloween jewelry making party. Our Halloween DIY beaded bracelet kits are specifically designed to make hosting easy and fun. Each kit comes packed with a delightful assortment of spooky beads, enchanting charms, and all the cord you need to create multiple unique bracelets. They are perfect for both kids and adults, with a mix of bead sizes and styles.
Don't let the planning stress you out. Make your spooky season unforgettable by hosting a creative, fun, and memorable Halloween jewelry making party! Shop our exclusive Halloween DIY beaded bracelet kits now at Jewelry Made By Me and get everything you need in one easy click!
FAQs for A Successful Halloween Jewelry Making Party
Q1: What is the best age range for a Halloween jewelry making party?
A1: A Halloween jewelry making party can be adapted for a wide range of ages. For children, ages 5 and up are generally a good fit, as they have the fine motor skills to handle beads and string. For younger children, you can use larger beads and a thicker cord. The activity is also perfect for tweens, teens, and adults who can handle more intricate designs and smaller beads. The key is to provide a variety of materials and project ideas to suit different skill levels, ensuring that everyone has a great time and leaves with a piece of jewelry they love.
Q2: What kind of space is best for a jewelry making party?
A2: The best space for a jewelry making party is a large, flat surface like a dining table or a series of folding tables. Make sure the area is well-lit so guests can see the beads clearly. You'll also want to protect the surface with a tablecloth or placemats to prevent scratches and make cleanup easier. A bead mat or tray for each person is highly recommended to keep beads from rolling everywhere. Good ventilation is a plus, and having a dedicated "supply station" where everyone can access beads and tools freely will help the party run smoothly.
Q3: How long should a Halloween jewelry making party last?
A3: A jewelry making party typically takes about 1.5 to 2 hours for a group of 8-10 people. This gives guests enough time to choose their beads, design their jewelry, and complete one or two pieces without feeling rushed. You can extend the party's duration by adding other activities, such as a costume contest, themed games, or a spooky movie marathon. For kids, keeping the creative portion to about 45 minutes to an hour and then transitioning to a snack or another activity is a great way to maintain their attention.
Q4: Do I need to provide tools for a jewelry making party?
A4: Yes, you should provide the necessary tools. For a simple beaded bracelet party, you will need sharp scissors to cut the cord. For more advanced projects, such as those for an adult party, small jewelry pliers (round nose and chain nose) are useful for opening and closing jump rings and attaching clasps. It is also helpful to have bead design boards or sorting trays available to help guests lay out their designs. Using a pre-made kit, such as the ones from Jewelry Made By Me, often includes all the essential tools and materials, making the process much simpler.
Q5: How can I make the party more eco-friendly?
A5: To make your Halloween jewelry making party more eco-friendly, you can choose beads made from natural or recycled materials like wood, clay, or recycled glass. You can also encourage guests to bring their own old jewelry to deconstruct and repurpose the beads and charms. Instead of using disposable plates and cups, opt for reusable tableware. After the party, store any leftover beads and supplies in reusable containers for future crafting projects. You can also offer a variety of repurposed materials, like bottle caps or old buttons, as creative add-ons for the jewelry.