Halloween is more than just a holiday; it's a spectacle, a chance to embrace the mysterious, the macabre, and the downright magical. While costumes often take center stage, true aficionados know that the devil is in the details. And what detail could be more captivating than custom-made Halloween jewelry? Far from being an afterthought, the right piece of DIY jewelry can elevate your costume from fun to unforgettable, transforming your look from subtly spooky to magnificently monstrous.
This year, forget the flimsy, mass-produced accessories that break before the first trick-or-treater arrives. We're diving deep into the thrilling world of DIY Halloween jewelry making, exploring how you can craft stunning pieces that truly reflect your unique style. Whether your aesthetic leans towards the understated elegance of "Spooky Chic" or the dazzling extravagance of "Ghoulishly Glam," Jewelry Made By Me is here to guide you, offering the insights and inspiration you need to bring your most hauntingly beautiful visions to life.
Why DIY Your Halloween Jewelry?
There's an undeniable allure to crafting your own accessories, especially for a holiday as expressive as Halloween.
-
Unleash Your Creativity: DIY offers unparalleled freedom. You're not limited by what's available in stores; your imagination is the only boundary. Want a necklace adorned with tiny, glittering ghosts? Or perhaps a bracelet that whispers tales of ancient curses with its dark, intricate beads? With DIY, it's all possible.
-
Personalization is Key: Your Halloween costume is a reflection of you, and your jewelry should be too. Handmade pieces ensure that your accessories are perfectly tailored to your ensemble, your personality, and even your mood. No more compromising on color, style, or theme.
-
Stand Out from the Crowd: In a sea of store-bought costumes, a custom-made piece of jewelry is a subtle yet powerful statement. It's unique, eye-catching, and tells a story that mass-produced items simply can't. You'll be the talk of the Halloween party, not just for your costume, but for the intricate details you've personally brought to life.
-
Cost-Effective Spookiness: While specialty Halloween jewelry can fetch a high price, crafting your own often proves to be significantly more budget-friendly. By sourcing individual beads, charms, and findings, you can achieve a high-end look without the premium price tag. Plus, many of the base materials are reusable for future projects!
-
The Joy of Creation: There’s a profound satisfaction that comes from bringing a creative vision to fruition with your own hands. The process of designing, selecting materials, and assembling your jewelry can be incredibly therapeutic and rewarding. It's a journey from concept to tangible art, resulting in a piece you can wear with pride.

Decoding the Halloween Jewelry Aesthetics: Spooky Chic vs. Ghoulishly Glam
Before you dive into your bead box, it’s helpful to define the vibe you're going for. Halloween jewelry isn't a monolith; it encompasses a vast spectrum of styles. For the purpose of this guide, we'll explore two prominent, yet distinct, aesthetics: Spooky Chic and Ghoulishly Glam. Understanding these will help you choose your materials and design elements with greater intention.
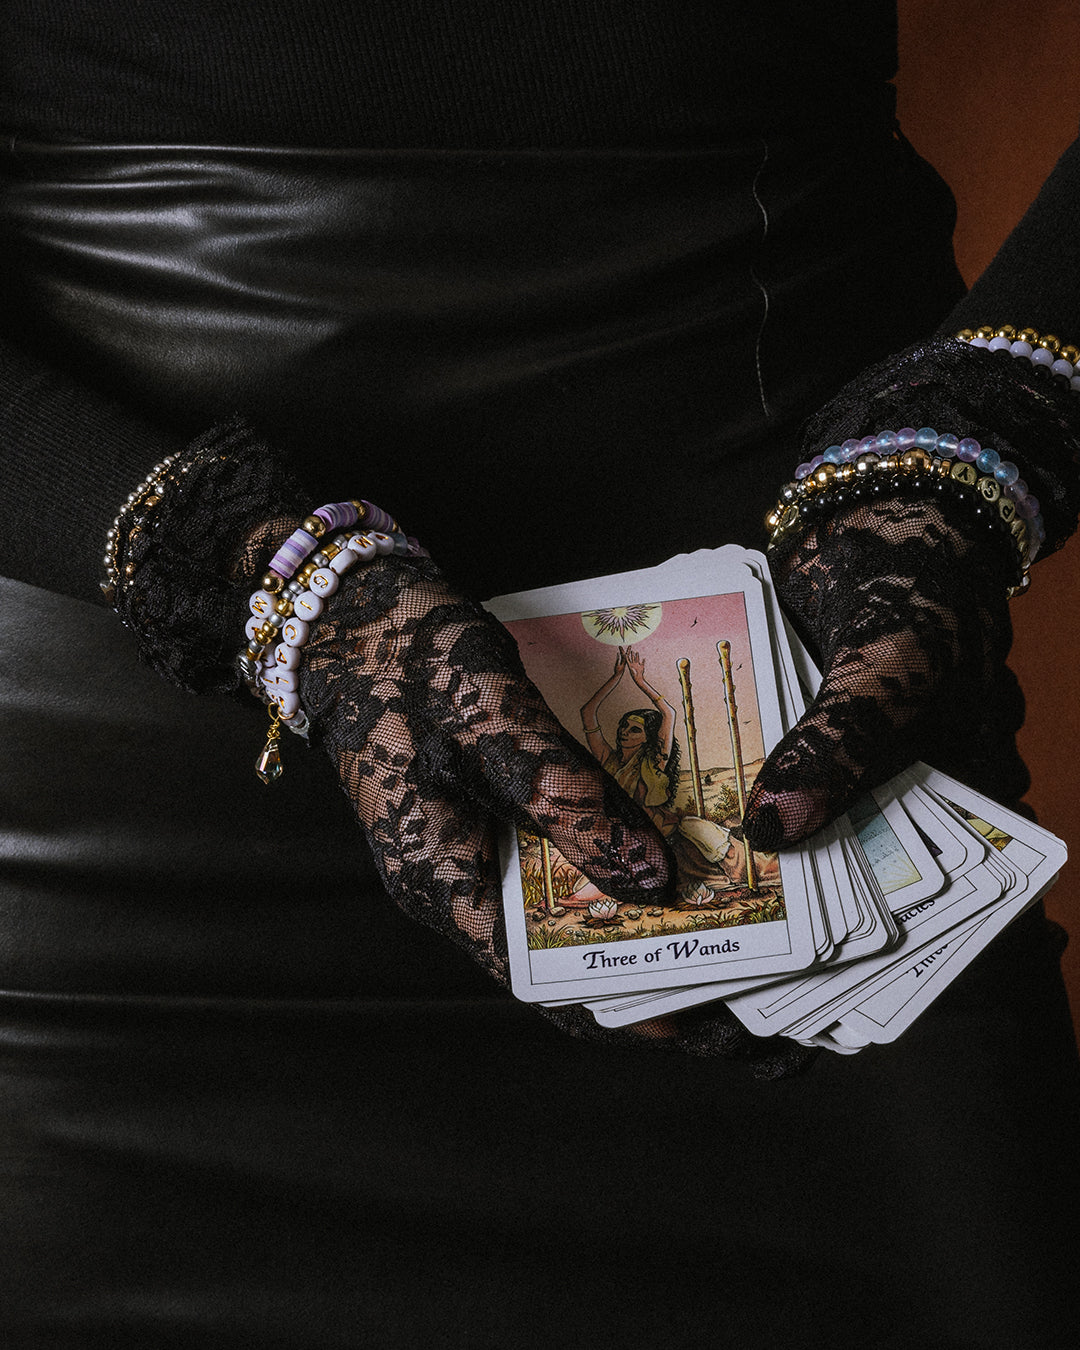
Spooky Chic: Elegant Whispers of the Macabre
The Spooky Chic aesthetic is for those who appreciate the subtler side of Halloween. Think refined elegance with a hint of darkness, a sophisticated nod to the eerie rather than an overt shout. It’s about incorporating classic Halloween motifs in a way that feels polished, perhaps even understated, allowing the inherent creepiness to shine through with a touch of grace.
Key Elements of Spooky Chic:
-
Color Palette: Dominated by deep, muted tones. Think charcoal grays, obsidian blacks, antique silvers, tarnished golds, deep burgundies, forest greens, and perhaps a touch of dusty rose or pale lavender. The idea is sophisticated and somber, not bright and playful.
-
Materials: Favor natural or distressed finishes. Matte beads, dark metal charms (oxidized silver, antiqued brass), black onyx, hematite, dark pearls, smoky quartz, and subtle crystal accents. Think less sparkle, more mysterious gleam.
-
Motifs: Classic, but minimalist. Delicate spiderwebs, tiny bat silhouettes, minimalist skull outlines, crescent moons, single raven feathers, subtle ghost shapes, or perhaps a single, perfectly formed black rose. The motifs are often small and integrated into the design rather than being the sole focal point.
-
Design Philosophy: Less is more. Focus on clean lines, delicate chains, single pendants, stacked minimalist bracelets, and subtle drop earrings. The design should evoke a sense of vintage gothic romance or mysterious allure.
-
Examples: A silver chain with a small, intricately detailed bat charm; matte black bead earrings with a single, subtle crystal accent; a bracelet featuring dark wood beads interspersed with tiny silver skulls; a delicate necklace with a single, elongated crescent moon pendant.
Spooky Chic jewelry pairs perfectly with costumes that are elegant yet haunting, such as a Victorian ghost, a sophisticated vampire, a dark fairy, or even just a chic black outfit that needs a touch of Halloween spirit. It's jewelry that can transcend the holiday, offering a touch of gothic flair to your everyday wardrobe.
Ghoulishly Glam: Dazzling Displays of Darkness
On the opposite end of the spectrum lies Ghoulishly Glam, an aesthetic that embraces maximalism, sparkle, and overt theatricality. This style is for those who want their Halloween jewelry to be a showstopper, dazzling onlookers with its bold colors, glittering accents, and unmistakable holiday spirit. It’s about celebrating the fun and extravagance of Halloween with a generous dose of sparkle and shine.
Key Elements of Ghoulishly Glam:
-
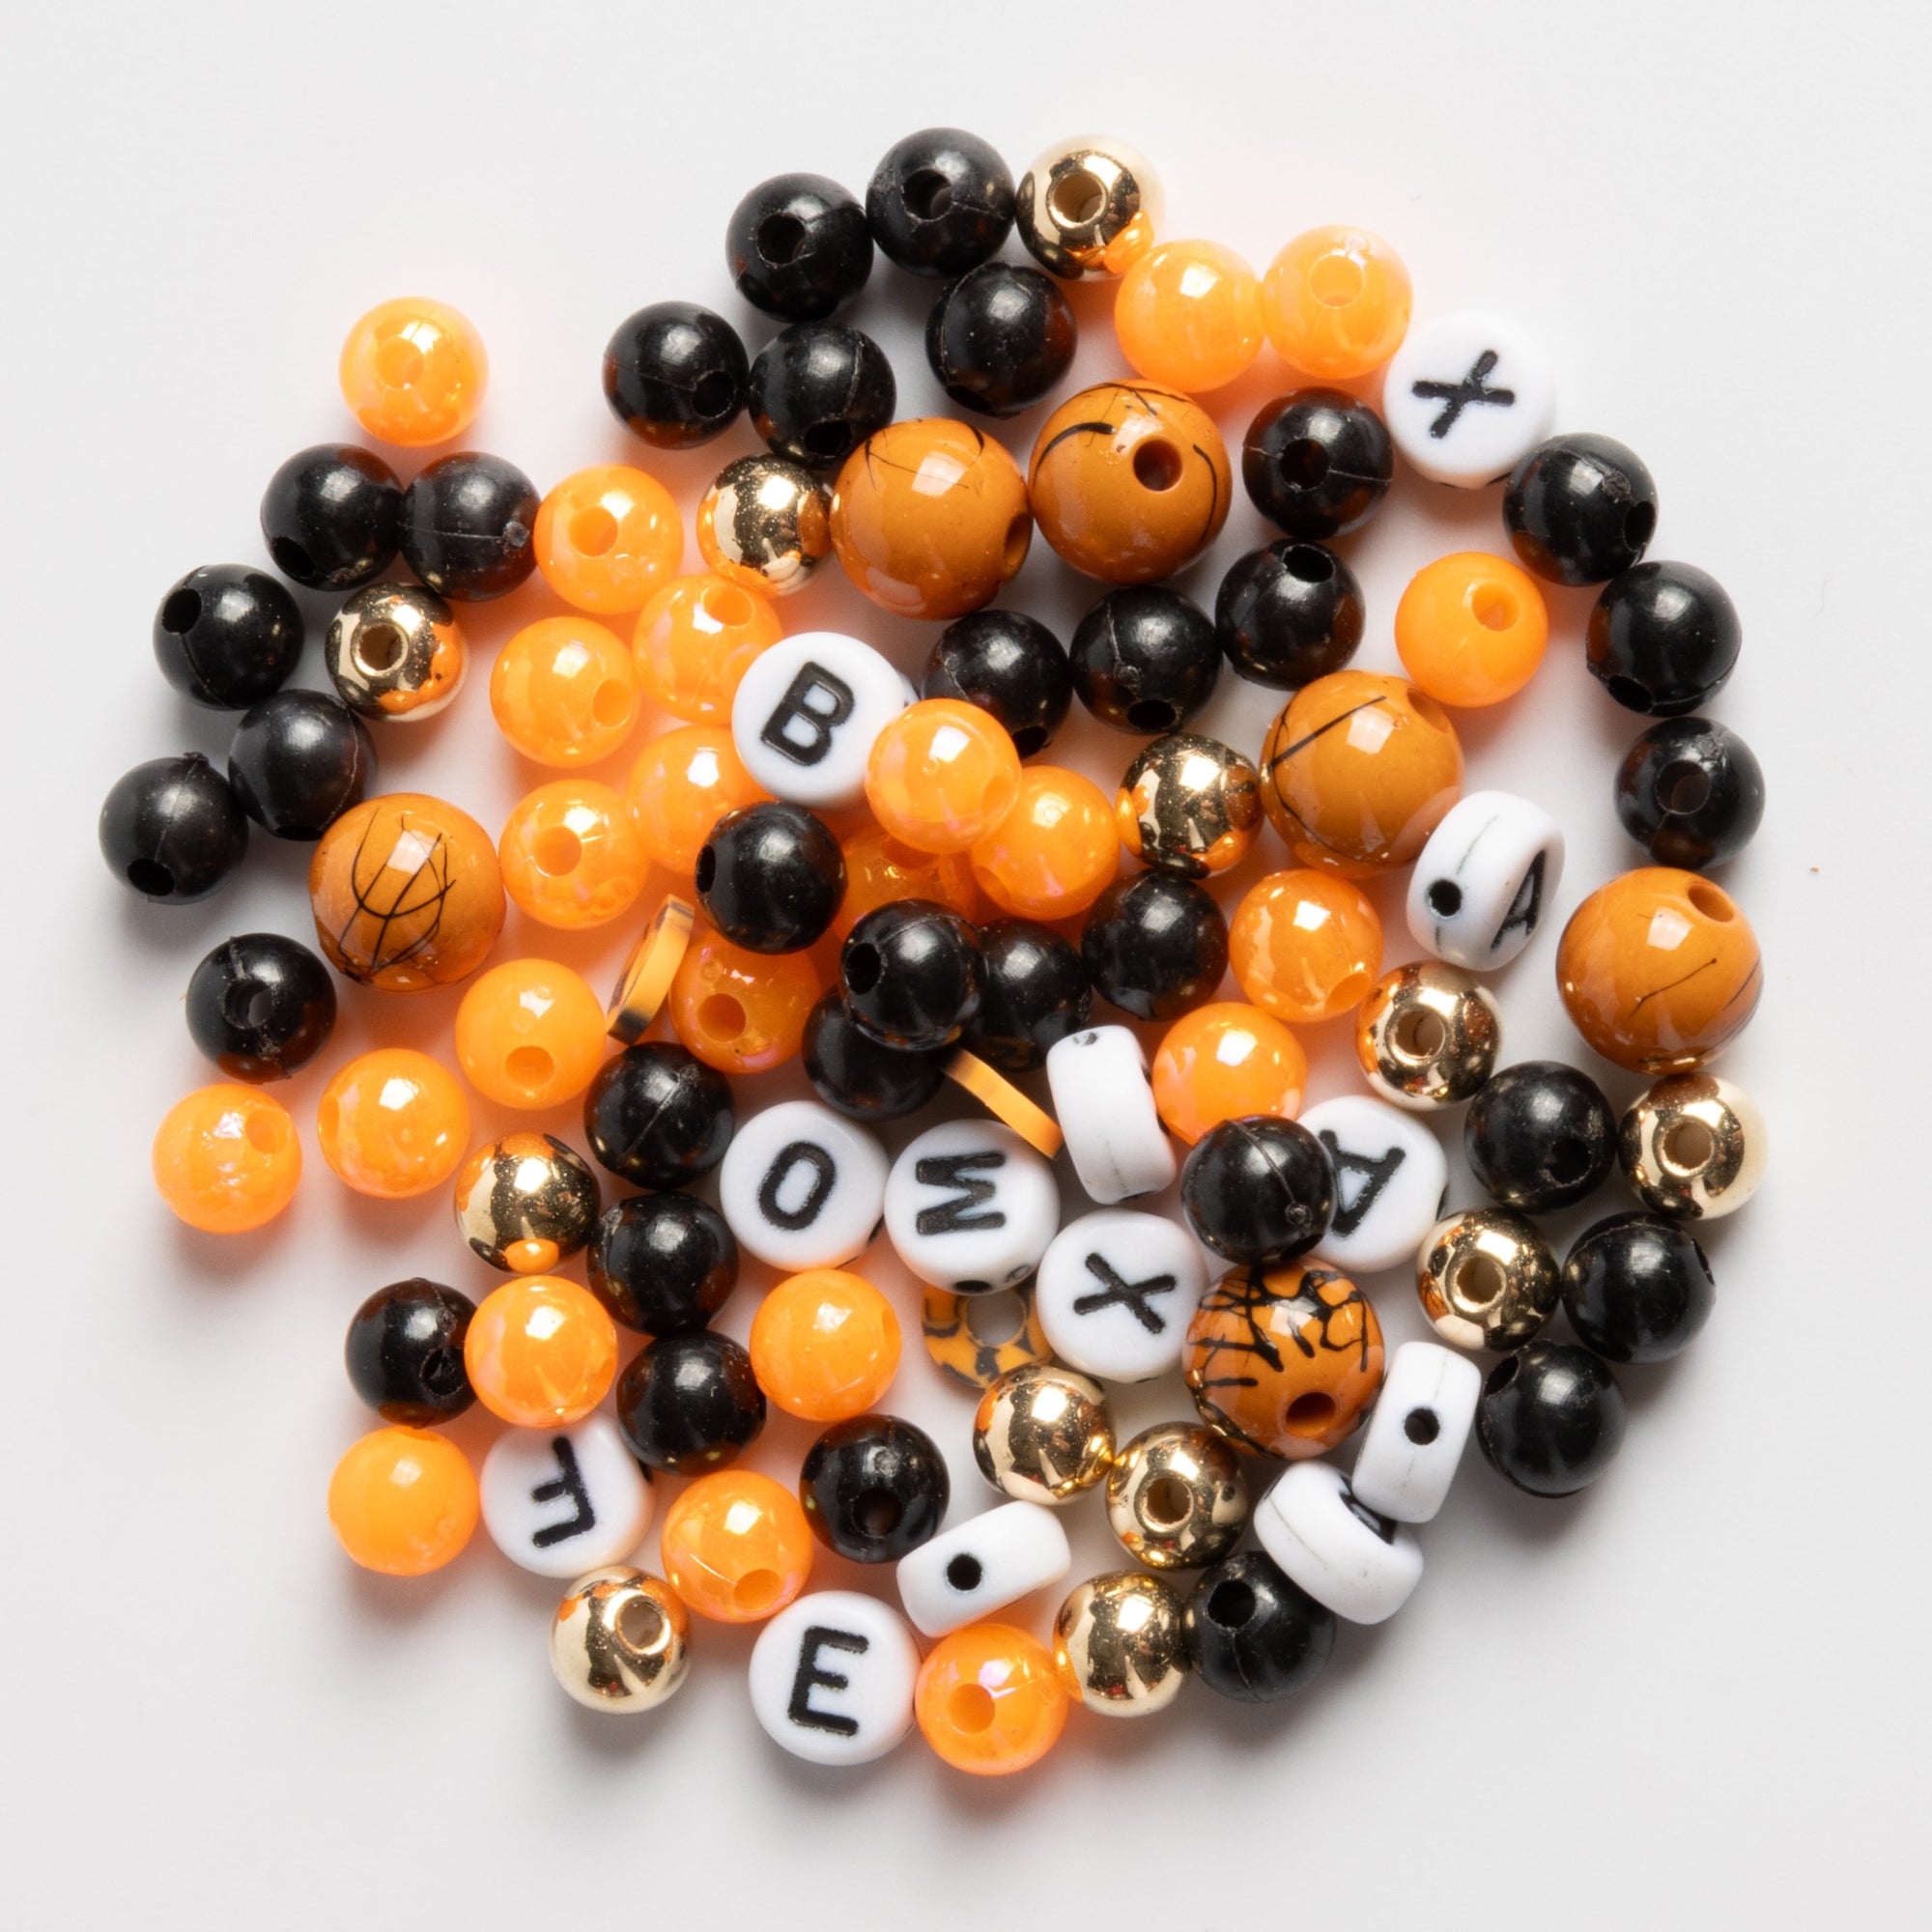
Color Palette: Vibrant and eye-catching. Classic Halloween orange and black, electric purples, vibrant greens, blood reds, shimmering silvers, and dazzling golds. Glitter and iridescent finishes are highly encouraged.
-
Materials: Focus on shine and impact. Faceted crystals, glitter-infused beads, metallic beads (gold, silver, copper), rhinestones, large acrylic charms, bold enamel pieces, and anything that catches the light. Think bright, glossy, and highly reflective.
-
Motifs: Exaggerated and playful. Large, smiling pumpkins; elaborate, jeweled spiders; Frankenstein monster bolts; candy corn; oversized skulls with rhinestone eyes; mischievous ghosts; bubbling cauldrons. The motifs are often larger, more colorful, and designed to be immediately recognizable as Halloween-themed.
-
Design Philosophy: Go big or go home! Layered necklaces, chunky bracelets, statement earrings, and intricate charm clusters. The design should feel fun, festive, and a little over-the-top, celebrating the joyous spookiness of the season.
-
Examples: A multi-strand bracelet featuring orange, black, and purple beads with dangling pumpkin and ghost charms; large, chandelier earrings dripping with green and purple crystals; a bold statement necklace with a central, rhinestone-encrusted skull pendant; a charm bracelet laden with various Halloween-themed enamel charms.
Ghoulishly Glam jewelry is the perfect complement to costumes that are vibrant, fun, or require a significant "wow" factor, such as a sparkly witch, a disco zombie, a gothic princess, or any character that demands attention and a touch of theatricality.
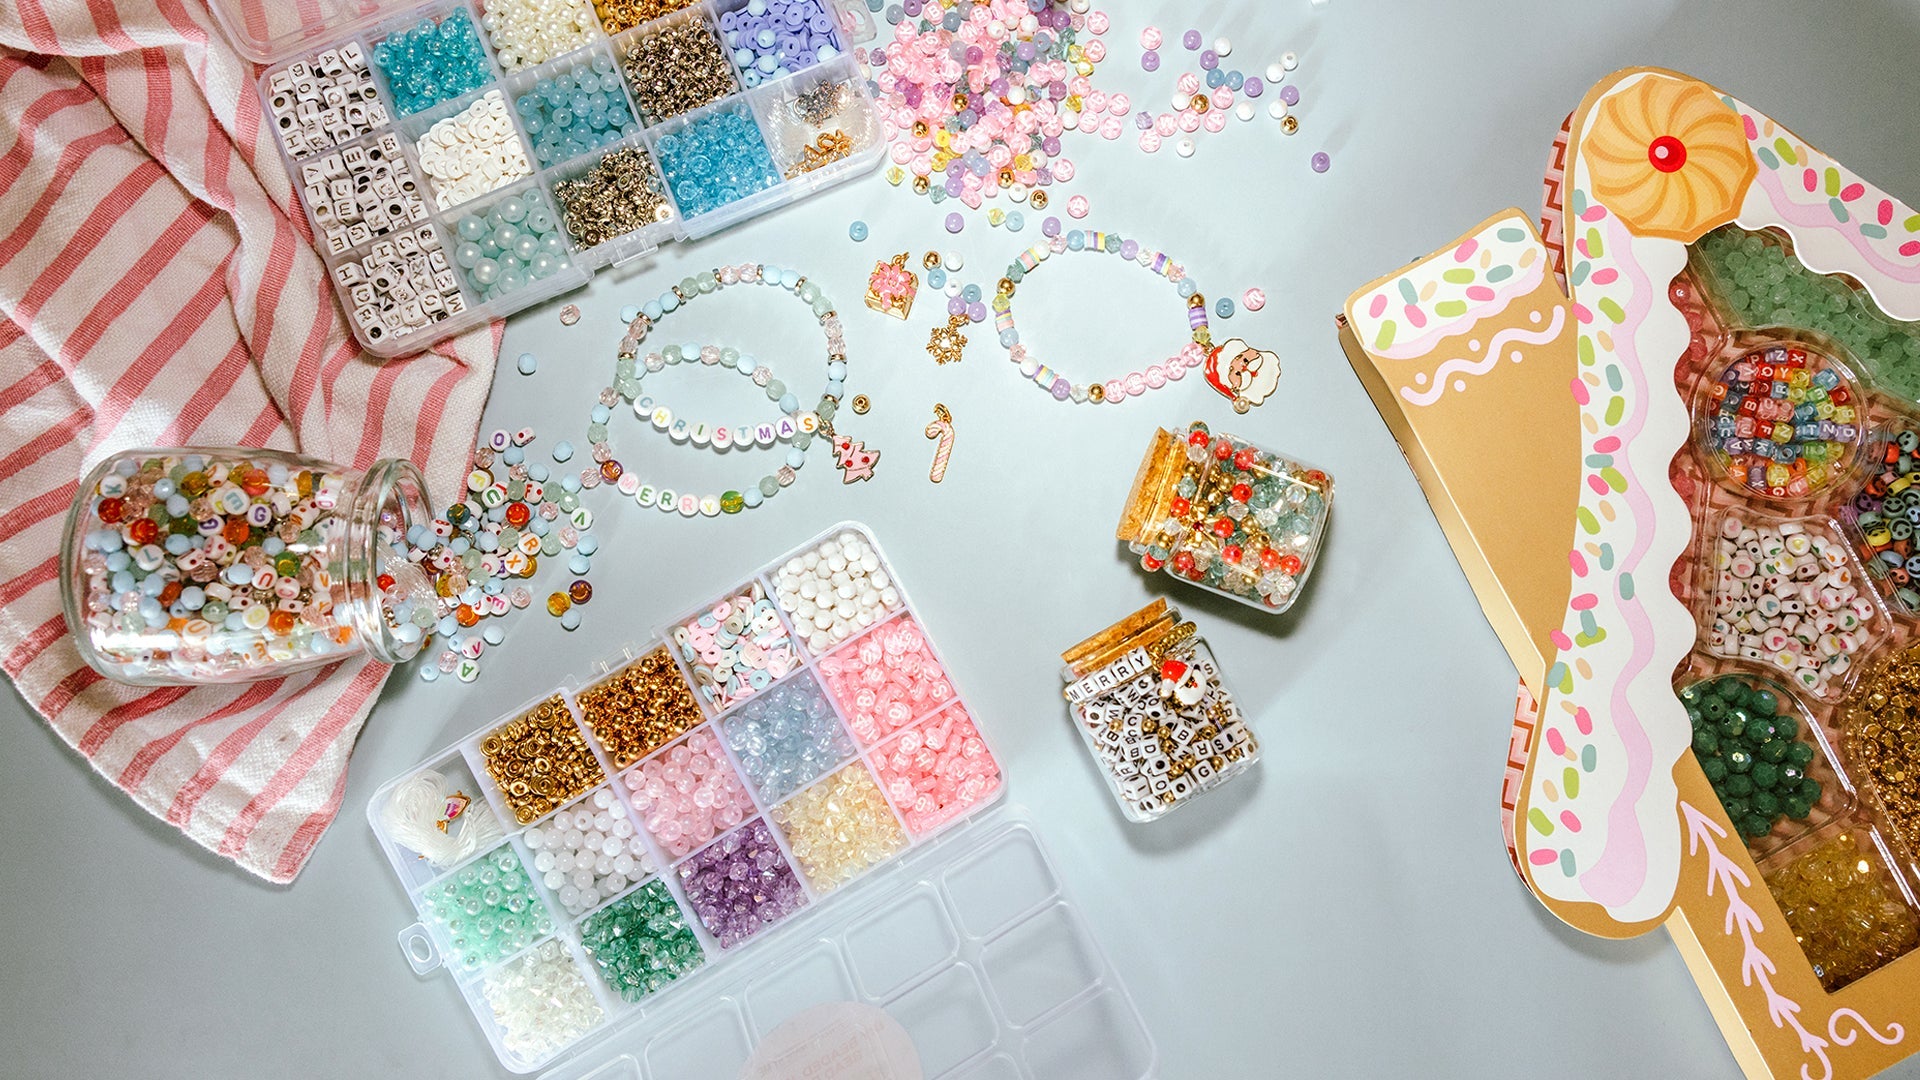
Essential Tools and Materials for Your DIY Halloween Jewelry Journey
No matter which aesthetic you choose, having the right tools and materials is crucial. Jewelry Made By Me offers a fantastic selection, especially if you're looking to jumpstart your projects with high-quality components.
Basic Tools You'll Need:
-
Round-Nose Pliers: Essential for creating loops and curves in wire.
-
Chain-Nose Pliers: Used for gripping, bending, and flattening wire, as well as opening and closing jump rings.
-
Flat-Nose Pliers: Similar to chain-nose but with wider, flatter jaws, good for gripping larger surfaces.
-
Wire Cutters: For cleanly snipping beading wire, headpins, and eyepins.
-
Crimping Pliers (Optional but Recommended for Bracelets): Specifically designed to secure crimp beads, giving your designs a professional finish.
-
Bead Mat: Prevents beads from rolling away and helps organize your workspace.
Key Materials for Halloween Jewelry:
-
Beads: The heart of many DIY projects!
-
Seed Beads: Tiny beads for intricate details, weaving, or adding texture.
-
Glass Beads: Offer a wide range of colors, finishes (opaque, translucent, iridescent), and shapes.
-
Acrylic Beads: Lightweight, often come in fun shapes and vibrant colors, perfect for Ghoulishly Glam designs.
-
Natural Stone Beads: Onyx, obsidian, smoky quartz for Spooky Chic elegance.
-
Charms & Pendants: The thematic stars of your pieces. Look for:
-
Skulls (from delicate to bedazzled)
-
Ghosts (classic white or glittery)
-
Bats (simple silhouettes or winged wonders)
-
Spiders & Spiderwebs (from elegant filigree to creepy-crawly)
-
Pumpkins & Jack-O'-Lanterns
-
Witch Hats, Cauldrons, Broomsticks
-
Vampire Fangs, Coffins, Gravestones
-
Cats (especially black cats!)
-
Candy Corn, Candy (for a sweeter Halloween vibe)
-
Findings: The functional components that hold your jewelry together.
-
Jump Rings: Small metal rings used to connect components.
-
Headpins & Eyepins: Wires with a flat head or a loop at one end, used to create dangling elements.
-
Clasps: Essential for necklaces and bracelets (lobster claw, toggle, magnetic).
-
Earring Hooks/Posts: For creating earrings.
-
Crimp Beads/Tubes: Used with crimping pliers to secure wire ends.
-
Beading Wire/Thread:
-
Beading Wire: Flexible, multi-strand wire, ideal for bracelets and necklaces (e.g., Soft Flex, AccuFlex).
-
Elastic Cord: Perfect for stretch bracelets, especially for beginners.
-
Nylon or Polyester Thread: For bead weaving or more delicate projects.
Pro Tip: Look for themed bead mixes and charm sets! Jewelry Made By Me's "Spooky Jewelry Collection" is an excellent place to start, as it curates all the perfect Halloween-themed elements, making your selection process a breeze.

DIY Halloween Jewelry Project Ideas: Bring Your Vision to Life
Now for the fun part: crafting! Here are some project ideas spanning both Spooky Chic and Ghoulishly Glam, along with tips to get you started.
Spooky Chic Project Ideas:
-
Delicate Spiderweb Drop Earrings:
-
Materials: Small, thin spiderweb charms (silver or antiqued brass), black onyx or hematite beads (2-4mm), silver headpins, silver chain-nose pliers, wire cutters, earring hooks.
-
How-to: Thread one onyx bead onto a headpin, create a loop at the top, and attach it to a spiderweb charm. Attach the charm to an earring hook using a jump ring. Repeat for the second earring. The key is subtlety and clean execution.
-
Gothic Skull & Pearl Bracelet:
-
Materials: Small, polished skull beads (metal or dark stone), dark gray or black glass pearls (6-8mm), beading wire, crimp beads, crimping pliers, a small toggle clasp.
-
How-to: String pearls and skull beads in an alternating pattern onto beading wire. Secure each end with a crimp bead and attach half of the toggle clasp. This creates a refined, understated macabre look.
-
Mysterious Crescent Moon Necklace:
-
Materials: One elegant crescent moon pendant (oxidized silver or dark bronze), delicate silver chain, small jump rings, lobster clasp.
-
How-to: Simply attach the pendant to the center of your chosen chain using a jump ring. Add a lobster clasp and a jump ring to the ends of the chain. This piece is all about the singular, impactful motif.
Ghoulishly Glam Project Ideas:
-
Sparkling Pumpkin & Ghost Charm Bracelet:
-
Materials: Assorted vibrant orange, black, and purple glass or acrylic beads, various Halloween-themed charms (glittery pumpkins, happy ghosts, bats with rhinestone eyes – check out Jewelry Made By Me's "Spooky Jewelry Collection"!), elastic cord, super glue.
-
How-to: String beads onto the elastic cord, leaving space for charms. Before tying off the knot, strategically add charms to the cord using jump rings, ensuring an even distribution. Tie a secure surgeon's knot, add a tiny dot of super glue for extra security, and trim excess cord. This is where your Jewelry Made By Me DIY beaded bracelet kits truly shine, providing all the themed components for a cohesive, dazzling design!
-
Chandelier Spider Earrings:
-
Materials: Large, elaborate spider charms (perhaps with rhinestones!), various sizes of faceted purple, green, and black crystals, headpins, jump rings, chandelier earring findings, earring hooks.
-
How-to: Attach crystals to the chandelier findings using headpins, creating a tiered, dangling effect. Suspend the spider charm from the bottom-most loop of the chandelier finding. Attach the entire piece to an earring hook. The more sparkle, the better!
-
Statement Candy Corn Necklace:
-
Materials: Large candy corn-shaped beads or charms, chunky orange, yellow, and white beads, thick black chain, large jump rings, a bold toggle clasp.
-
How-to: Create sections of color by stringing the orange, yellow, and white beads onto short pieces of wire or beading thread, securing them with crimps or knots. Attach these sections to the chunky black chain using large jump rings, with the candy corn charms interspersed throughout. Finish with a prominent toggle clasp.
Design Tips for All Skill Levels
-
Start Simple: If you're a beginner, begin with easy projects like stretch bracelets or single-charm necklaces. Mastering basic techniques like opening jump rings and crimping will build your confidence.
-
Theme Cohesion: Even with an eclectic holiday like Halloween, aim for a cohesive theme within a single piece or set. Are you going for cute, creepy, elegant, or whimsical? Let that guide your material choices.
-
Balance is Key: For earrings, ensure they are balanced in weight and visual appeal. For necklaces and bracelets, distribute charms and beads evenly.
-
Play with Texture: Combine smooth glass beads with rougher stone beads, or matte finishes with glossy ones, to add visual interest.
-
Don't Fear Color: Halloween is the perfect time to experiment with bold and unusual color combinations. Think beyond just orange and black – deep purples, emerald greens, blood reds, and electric blues can be incredibly effective.
-
Inspiration is Everywhere: Look at Halloween decor, costume ideas, even classic horror movies for unique motifs and color schemes. Pinterest and Instagram are treasure troves of inspiration!
-
Safety First: Always use appropriate tools carefully. Keep small beads and components away from pets and young children.
-
Practice Makes Perfect: Don't get discouraged if your first few attempts aren't exactly what you envisioned. Jewelry making is a skill that improves with practice. Each piece you create is a step forward in your crafting journey.
Caring for Your Haunted Creations
Once you've poured your creativity into your DIY Halloween jewelry, you'll want it to last beyond just one night of revelry.
-
Storage: Store your handmade pieces in a cool, dry place, ideally in individual small bags or compartments to prevent tarnishing, scratching, and tangling.
-
Cleaning: Most fashion jewelry can be gently wiped with a soft, dry cloth after wearing to remove oils and dirt. Avoid harsh chemical cleaners, as they can damage beads and finishes.
-
Wearing: Put your jewelry on after applying perfumes, lotions, or hairspray, as these can affect certain materials and finishes. Remove jewelry before showering, swimming, or engaging in strenuous activities to protect it from moisture and impact.
With proper care, your DIY Halloween jewelry can become cherished pieces you bring out year after year, or even incorporate into your everyday wardrobe for a touch of year-round spooky flair.
Frequently Asked Questions About DIY Halloween Jewelry
Got more questions brewing? We've got answers!
Q1: I'm a complete beginner. Where should I start with DIY Halloween jewelry?
A1: Start with simple projects like stretch bracelets using elastic cord or single-charm necklaces. These require minimal tools and teach you basic skills like stringing beads and attaching charms. Jewelry Made By Me's DIY beaded bracelet kits are an excellent starting point as they often include all the necessary components and instructions.
Q2: What's the main difference between "Spooky Chic" and "Ghoulishly Glam" styles?
A2: "Spooky Chic" is about subtle elegance with a hint of darkness, using muted colors, natural materials, and minimalist designs (e.g., a delicate silver bat necklace). "Ghoulishly Glam" is bold, dazzling, and theatrical, featuring vibrant colors, glitter, rhinestones, and larger, more playful motifs (e.g., a multi-strand bracelet with sparkling pumpkin and ghost charms).
Q3: Can I use regular craft supplies I have at home for jewelry making?
A3: While some craft supplies might work for very basic projects, dedicated jewelry-making tools (like specific pliers and cutters) and materials (like beading wire, quality beads, and proper findings) will give you better results and more durable pieces. Investing in a few essential tools will make a big difference in your crafting experience and the longevity of your jewelry.
Q4: How can I make my DIY Halloween jewelry more durable?
A4: Use high-quality beading wire or strong elastic cord. Ensure all knots are secure (e.g., surgeon's knot for elastic) and reinforced with a tiny dot of super glue if appropriate. Properly crimping your crimp beads and securely closing jump rings will also prevent your jewelry from falling apart.
Q5: Where can I find unique Halloween-themed charms and beads?
A5: Many online specialty stores and craft shops offer a wide selection. For a curated collection of perfect Halloween elements, be sure to explore Jewelry Made By Me's "Spooky Jewelry Collection." They've done the work of sourcing the best thematic components for your projects.
Q6: Are these DIY projects suitable for kids?
A6: Many DIY jewelry projects, especially simple beaded bracelets with elastic cord, can be great for older children (with adult supervision). However, small beads and sharp tools require careful handling, so always supervise children and choose age-appropriate projects.
Q7: How do I store my handmade Halloween jewelry so it lasts?
A7: Store your pieces in a cool, dry place away from direct sunlight. Individual small plastic bags or jewelry boxes with compartments can prevent tangling, scratching, and oxidation. This is especially important for metal components that can tarnish.
Conclusion: Embrace Your Inner Halloween Artisan!
Halloween jewelry making is more than just a craft; it's an art form that allows you to express your unique take on the season of spirits and delights. Whether you're drawn to the subtle sophistication of Spooky Chic or the dazzling allure of Ghoulishly Glam, the possibilities are as boundless as your imagination.
By choosing to DIY, you're not just creating accessories; you're crafting wearable stories, pieces that hold your personal touch and creativity. So gather your supplies, let your imagination run wild, and transform ordinary beads and charms into extraordinary statements of Halloween style.
Ready to start your hauntingly beautiful jewelry projects? Don't wait until the last minute! Shop Jewelry Made By Me for your Halloween DIY beaded bracelet kits today and make this Halloween your most dazzling and distinctive yet! You'll find everything you need to conjure up captivating creations that truly stand out. Happy crafting, and have a ghoulishly glamorous Halloween!