The air gets crisp, the leaves turn vibrant shades of orange and red, and a feeling of festive spookiness takes over. It's the season for all things pumpkin spice, haunted houses, and, of course, killer Halloween costumes. But what's a great costume without the perfect accessories? This is where the magic of DIY spooky jewelry comes in. Gone are the days of mass-produced, flimsy plastic props. Instead, more and more people are discovering the joy of crafting their own unique pieces. There's something incredibly satisfying about wearing a piece you've made yourself, especially when it perfectly captures the spooky spirit of the season. Maybe it's a beaded bracelet adorned with tiny skulls or a charm necklace featuring a delicate spiderweb. The possibilities are endless, and the sense of accomplishment is unmatched.
At Jewelry Made BY Me, we've noticed a significant spike in interest for our Halloween DIY kits. We get so many questions from people eager to jump into this fun and creative process. From beginners wondering where to start to seasoned crafters looking for new ideas, the questions are always a mix of curiosity and a desire for the perfect finished product. It's this surge of interest that has inspired us to compile a list of the top five most asked questions about making your own spooky jewelry. We're here to guide you, answer your biggest concerns, and get you ready to craft some seriously stunning and spooky accessories. Whether you're making a single statement piece for a Halloween party or crafting a whole collection to celebrate the season, we're here to help you get started.
What Supplies Do I Need to Get Started Making Spooky Jewelry?
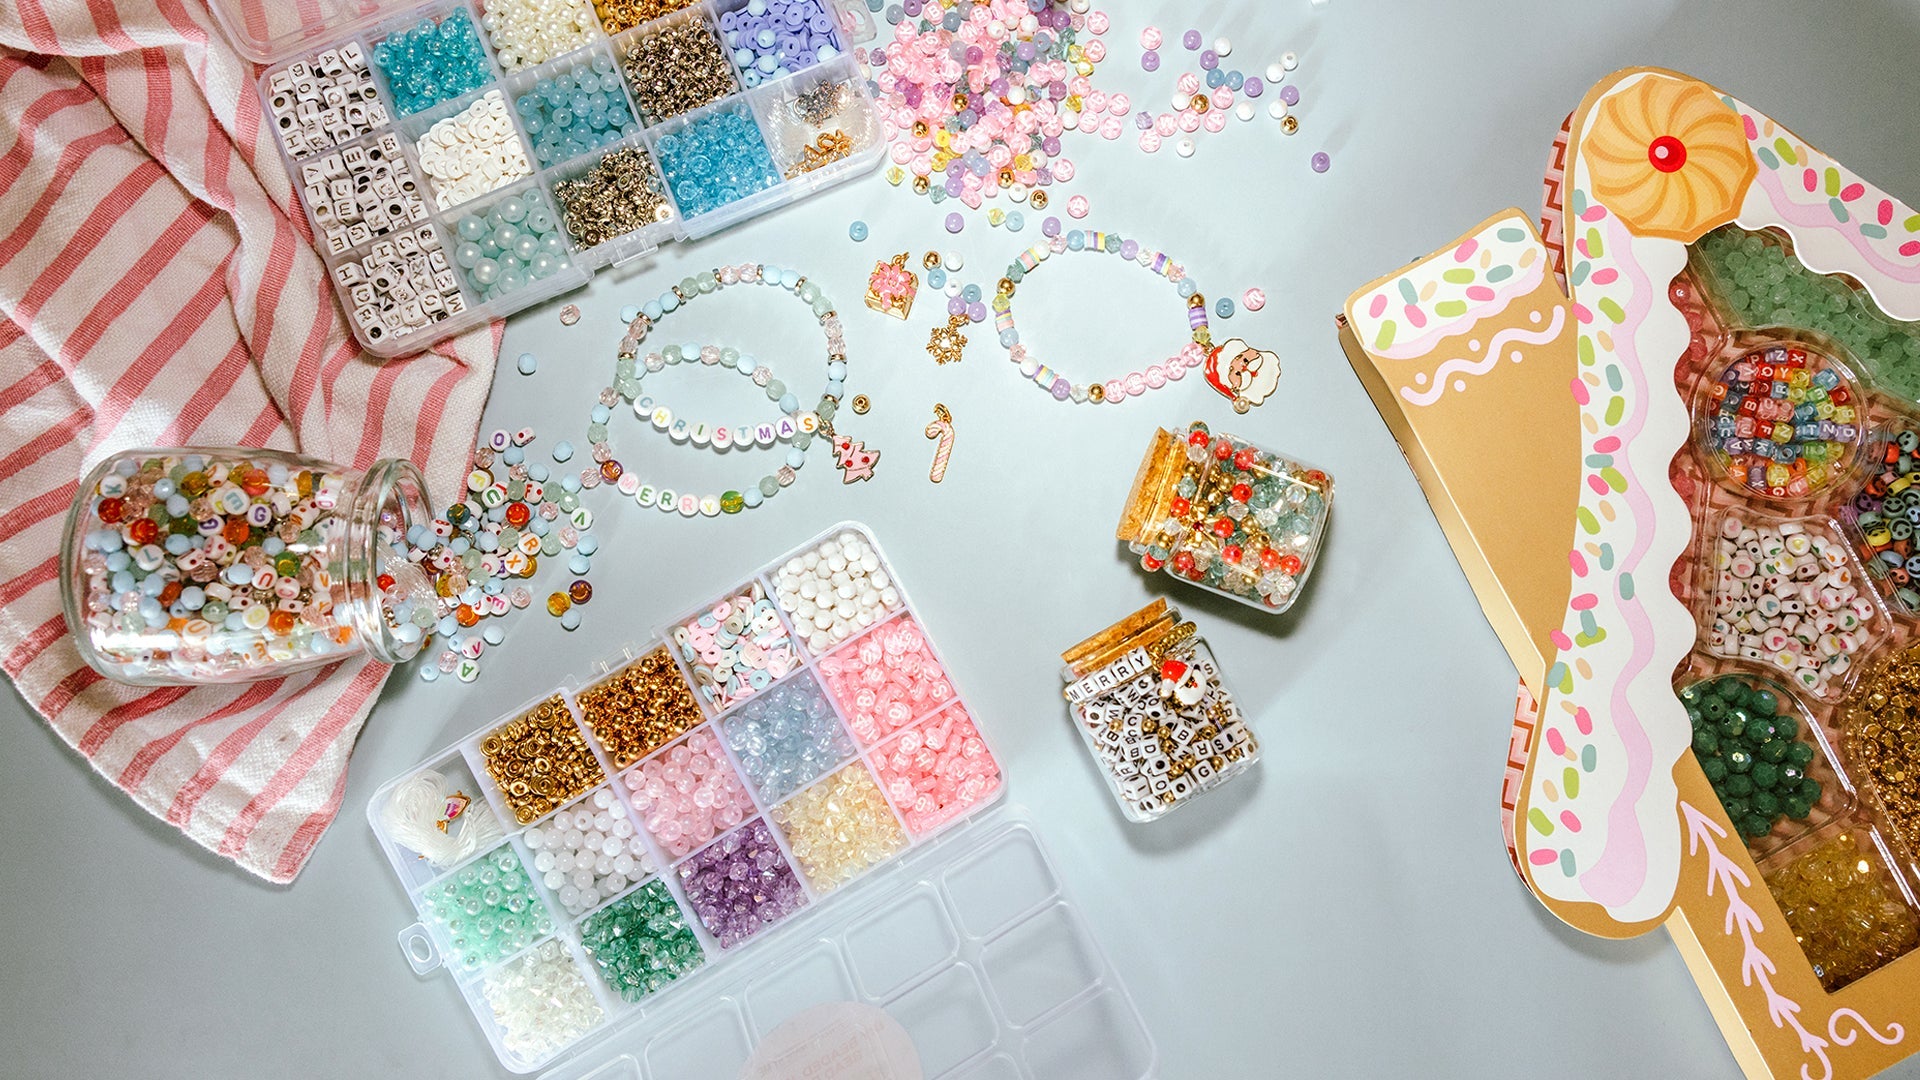
Jumping into any new craft can feel overwhelming, especially when you're not sure what tools and materials you'll need. Fortunately, making spooky beaded jewelry is a very accessible hobby with a relatively short list of essential supplies. The good news is that you don't need to go out and buy a huge, expensive kit with tools you may never use again. You can start with a few basic items and build your collection as you go. One of the best ways to get started is by choosing a curated kit, like those available at Jewelry Made BY Me. These kits take all the guesswork out of the process, providing you with everything you need in one convenient package.
-
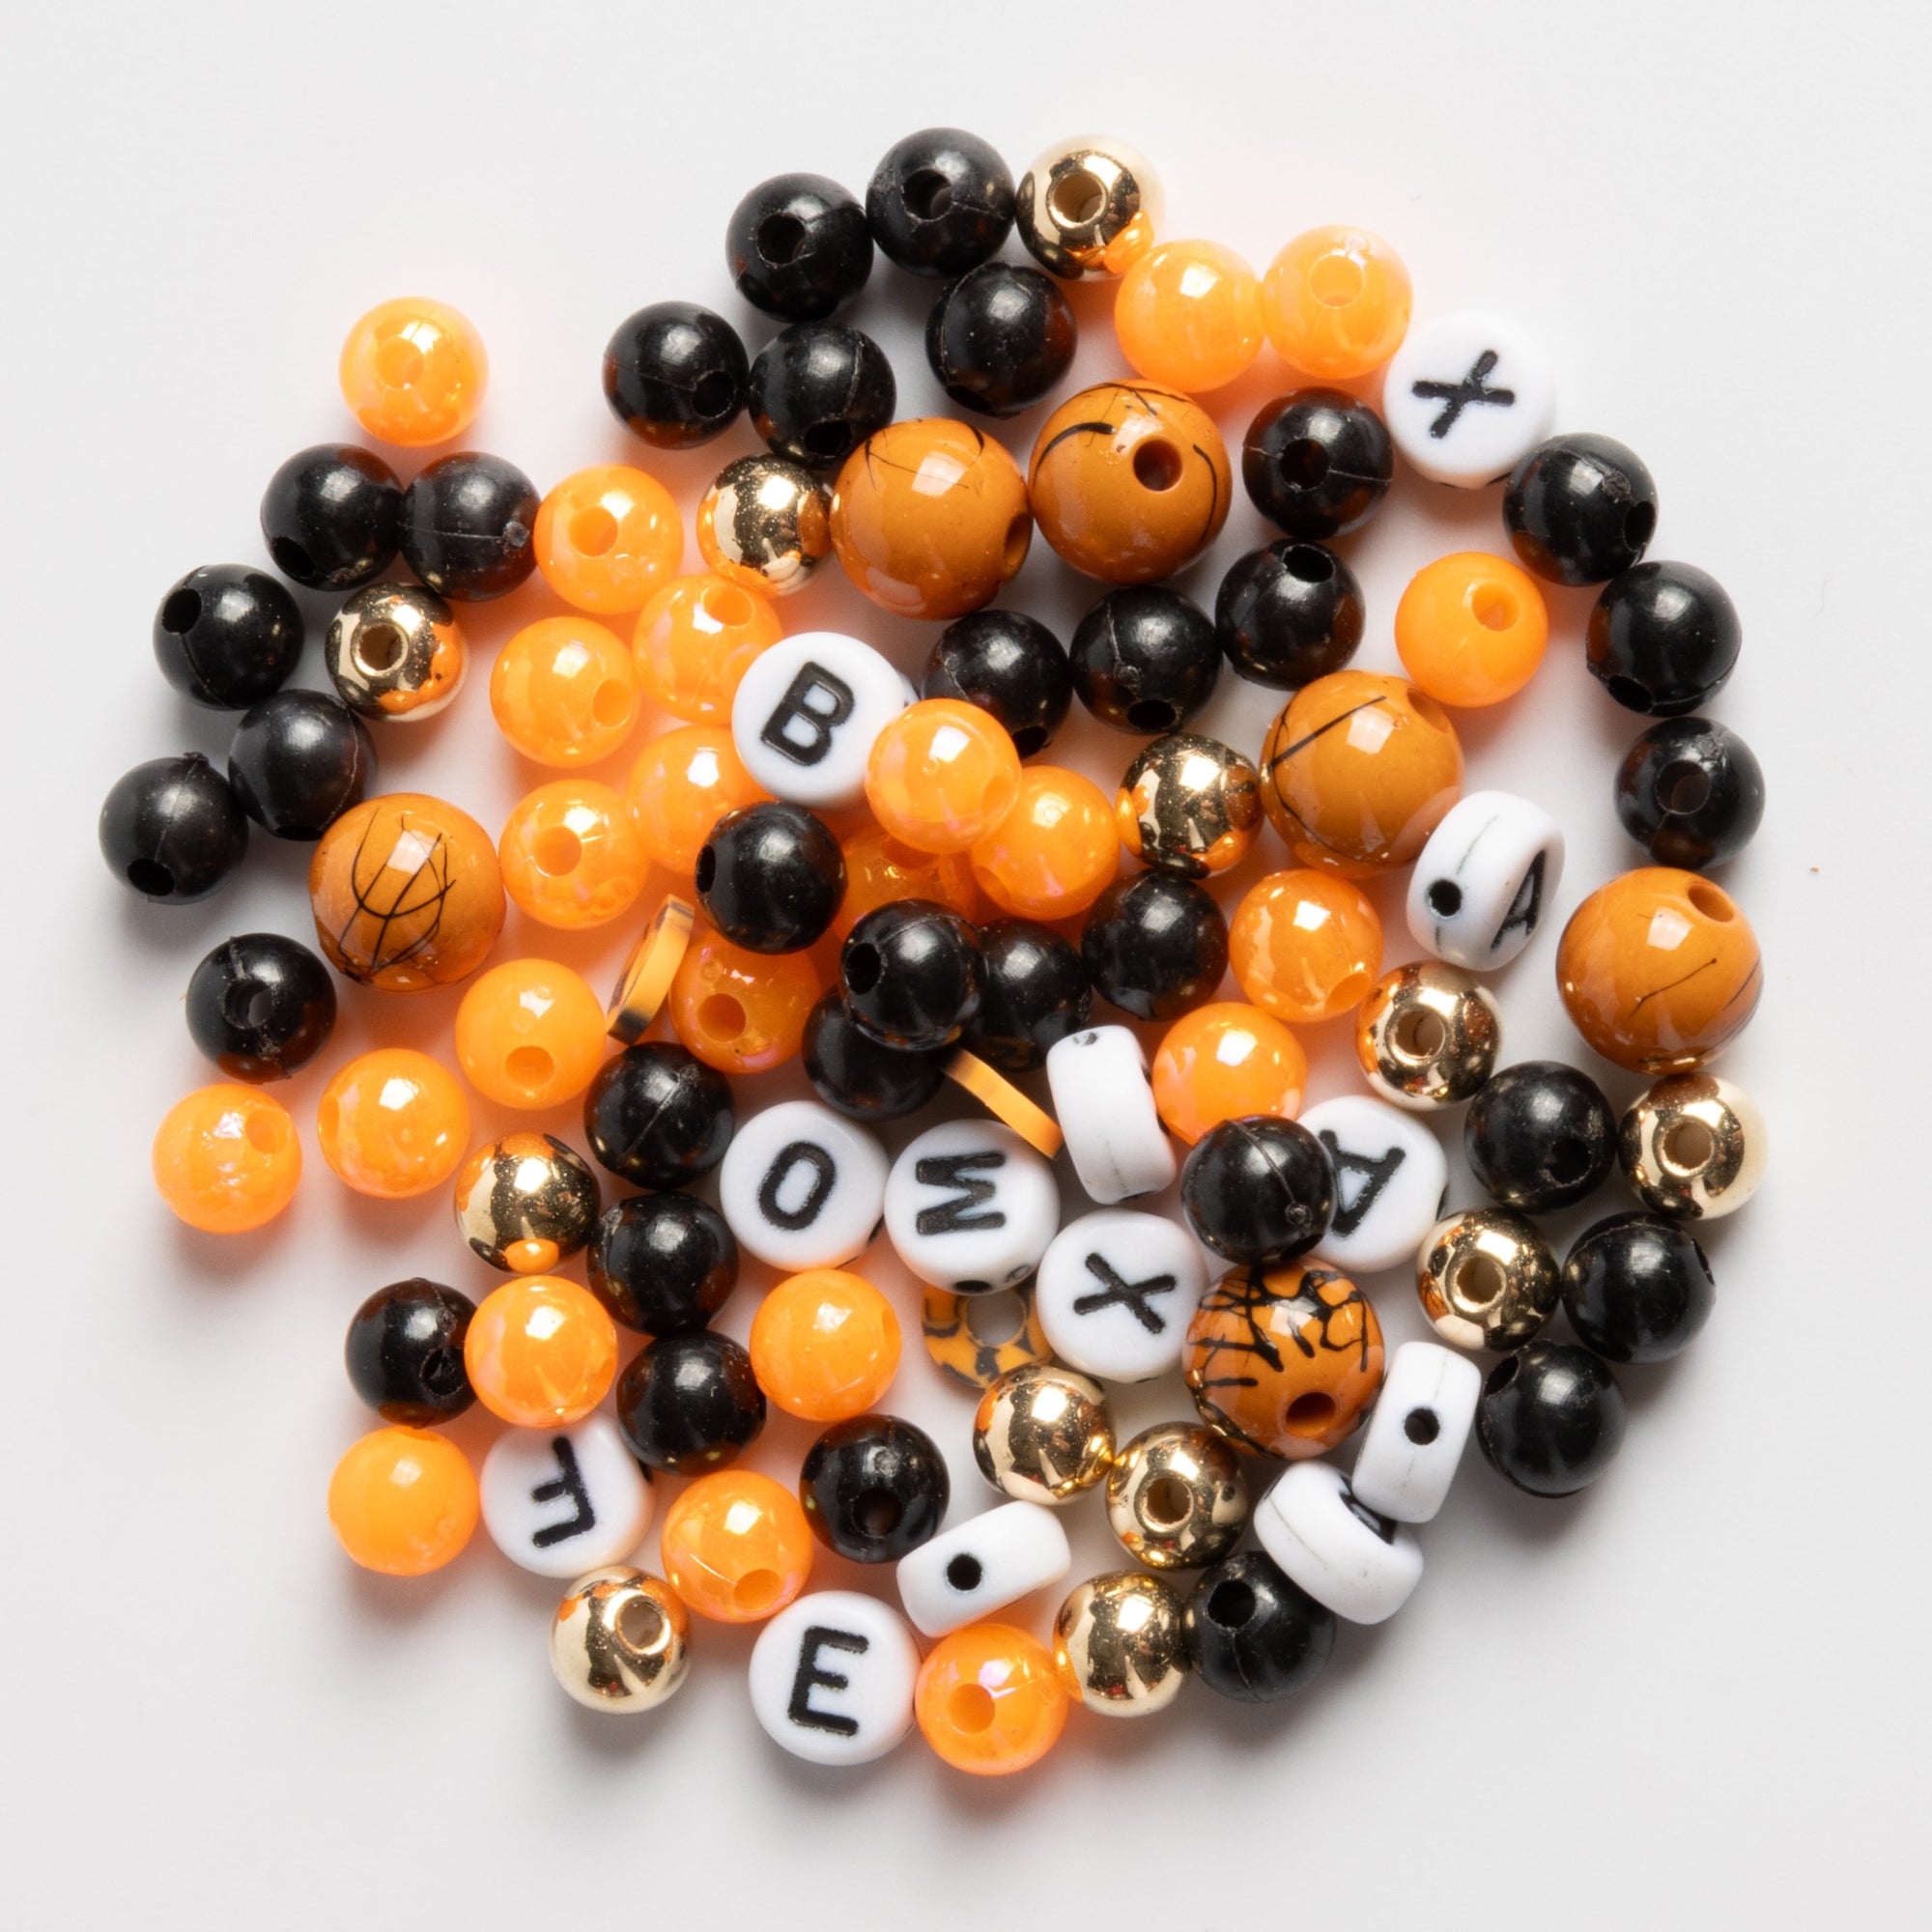
Beads: This is the fun part! For spooky jewelry, look for beads in thematic colors and shapes. Think about a Halloween palette: black, orange, purple, and green. You can also get more specific with your theme and choose beads in colors like:
-
Blood red
-
Ghostly white
-
Eerie gray
-
Slimy green
-
Midnight black
-
In terms of shapes, consider beads that have a spooky feel, such as skulls, spiders, bats, pumpkins, ghosts, or even simple geometric shapes that can be combined to create a creepy effect.
-
Stringing Material: The foundation of your bracelet or necklace. Your choice of material will depend on the weight of your beads and the desired look of your finished piece. Common options include:
-
Stretchy Cord: Perfect for beginner-friendly, slip-on bracelets. It’s easy to work with and doesn't require a clasp.
-
Beading Wire: Best for more structured pieces. It's strong and durable but requires a crimp bead and a clasp to finish.
-
Nylon or Silk Cord: Ideal for a more traditional look and for stringing beads with larger holes.
-
Essential Tools: While some kits come with these, it's good to have them on hand.
-
Scissors or Wire Cutters: For cutting your stringing material to the correct length.
-
Bead Organizer Tray: This isn’t a necessity but it helps keep your beads sorted and prevents them from rolling away.
-
Crimp Tool & Crimp Beads: If you're using beading wire, you'll need these to secure the clasp at the end of your bracelet.
-
Charms & Spacers: These are the details that truly elevate your spooky jewelry. Charms add a focal point, like a tiny skeleton or a vampire fang. Spacers can be used to add visual interest between beads. They can be simple silver or gold beads, or they can be themed, such as small bat or star shapes.
-
Clasps & Jump Rings: If your bracelet isn't stretchy, you'll need a clasp to connect the ends. Common types include lobster clasps, toggle clasps, and magnetic clasps. Jump rings are the small metal loops that connect the clasp to the end of your bracelet.
By gathering these materials, you're setting yourself up for a successful and fun crafting session. A Jewelry Made BY Me kit simplifies this by providing all the materials you need to create a complete piece of spooky jewelry, from the beads to the clasps, all in one box.

What Are the Best Halloween Themes and Color Palettes for DIY Jewelry?
When it comes to crafting your own spooky jewelry, the theme and color palette you choose are what truly make your piece stand out. While the classic orange and black will always be a solid choice, you can get much more creative and personal with your design. The best part about DIY is that you can mix and match to your heart's content, creating a piece that is truly one-of-a-kind. Think about your favorite aspects of the Halloween season and let that inspire you. Are you more into the creepy side of things, or do you prefer a more whimsical, friendly ghost vibe?
-
Classic Spooky: This theme is all about the traditional Halloween elements.
-
Colors: Deep black, vibrant pumpkin orange, ghostly white, and pops of blood red or eerie green.
-
Bead Shapes: Skulls, pumpkins, bats, spiderwebs, and spooky-eyed ghosts.
-
Feeling: Timeless, iconic, and perfect for any Halloween party.
-
Gothic Glam: For a more sophisticated and elegant spooky look.
-
Colors: Black, deep burgundy, silver, and maybe a touch of dark purple or sapphire blue.
-
Bead Shapes: Intricate filigree beads, crystal skulls, black obsidian, and hematite.
-
Feeling: Dark, mysterious, and perfect for adding an edgy touch to a formal outfit.
-
Witchcraft & Mystical: This theme leans into the magical and enchanted side of the season.
-
Colors: Deep forest green, earthy browns, midnight blue, and a touch of gold or bronze.
-
Bead Shapes: Crystal points, pentagrams, crescent moons, and stars.
-
Feeling: Magical, earthy, and connected to the ancient traditions of the season.
-
Mad Scientist's Lab: A fun, quirky theme inspired by classic horror films and scientific oddities.
-
Colors: Slime green, electric blue, stark white, and metallic silver.
-
Bead Shapes: Tiny test tubes, brains, eyeballs, and lightning bolts.
-
Feeling: Playful, quirky, and great for a unique, conversation-starting piece.
-
Vampire's Kiss: Elegant and deadly. This theme is all about refined spookiness.
-
Colors: Rich crimson, stark black, and metallic bronze or gunmetal.
-
Bead Shapes: Fangs, tiny bats, blood drops, and elegant, faceted crystal beads.
-
Feeling: Romantic, dangerous, and very dramatic.
The theme you choose will dictate the beads and charms you select. A Jewelry Made BY Me kit simplifies this by curating all the right pieces for a specific theme, so you don't have to search for individual components. We've taken the guesswork out of color pairing and theme creation, making it easy to create a cohesive and beautiful piece.
What's the Easiest Way to Make a Beaded Bracelet, and How Do I Finish It?
Making your own jewelry can seem daunting at first, especially when you think about complex knots or tiny clasps. But we're here to tell you that it's a lot easier than you think! For beginners, a simple stretch bracelet is by far the easiest place to start. It requires minimal tools and no special skills, making it a perfect project for a fun afternoon of crafting. Here’s a step-by-step guide to creating your very first beaded bracelet:
-
Step 1: Gather Your Materials. You'll need your beads, a stretchy cord, and a pair of scissors. If you have a bead tray, now is the time to use it to lay out your design.
-
Step 2: Measure and Cut. Cut a length of stretchy cord that is longer than your desired bracelet length. A good rule of thumb is to cut it at least 8 to 10 inches long. This gives you plenty of room to work with the beads and tie the final knot without fumbling.
-
Step 3: Arrange Your Beads. Before you start stringing, lay out your beads in the exact order you want them to appear on your bracelet. This helps you visualize the final design and ensures you don't make any mistakes.
-
Step 4: Start Stringing. Begin threading your beads onto the stretchy cord in the order you've arranged them. Push the beads down toward one end of the cord. You can use a small bead stopper or simply hold the end of the cord to prevent the beads from sliding off.
-
Step 5: Check the Fit. Once all your beads are on the cord, wrap the bracelet around your wrist to check the fit. It should be snug but not too tight. Make any adjustments by adding or removing beads as needed.
-
Step 6: The Knot. This is the most crucial part! Tie a surgeon's knot to secure the ends of the cord. This knot is a little different from a standard knot and is known for its strength.
-
First, tie a standard overhand knot.
-
Before you pull it tight, wrap one end of the cord around the other one more time. This creates a double wrap.
-
Pull the knot tight and trim the excess cord as close to the knot as possible, leaving a small tail.
-
Step 7: Final Touch. You can hide the knot inside one of the bead holes. Simply slide the knot into the hole of the nearest bead to conceal it, giving your bracelet a seamless, professional look.
Our Halloween DIY beaded bracelet kits from Jewelry Made BY Me come with easy-to-follow instructions and high-quality stretchy cord, making it foolproof to create a durable and beautiful piece you'll be proud to wear.
How Can I Make My Spooky Jewelry Stand Out and Look Professional?
The difference between a nice piece of homemade jewelry and a professional-looking one often comes down to the details. While the beads and theme are important, the little touches are what elevate your craft. If you're looking to make your spooky jewelry truly special and show off your skills, consider these tips and tricks. They are simple to implement but have a huge impact on the final product.
-
Incorporate Different Textures: Don't just use one type of bead. Mix and match different materials and textures to add visual interest. For example, pair smooth glass beads with rough lava beads or combine matte beads with shiny, metallic spacers. This contrast makes your design more dynamic.
-
Use Themed Charms: Charms are an easy way to add a focal point and a strong theme to your jewelry. For spooky jewelry, you can find a wide variety of charms, including tiny skulls, silver spiders, witch hats, or even small, detailed coffins. A single, well-placed charm can tell a story and make your piece feel more intentional and complete.
-
Add Layers: Create a layered look by making multiple bracelets of different styles or lengths. For example, you could create one simple stretch bracelet with just black beads, a second with orange and black beads, and a third with a central skull charm. Wearing them all together creates a rich, textured, and eye-catching stack.
-
Consider Bead Spacers: Bead spacers are tiny metal or glass beads that you place between larger beads. They add a touch of elegance and help highlight each individual bead. They can be simple round beads, or they can be decorative, such as tiny filigree designs.
-
Go Beyond the Bracelet: While bracelets are a great starting point, consider making other types of jewelry that match. Think about creating a matching necklace or a pair of earrings. This creates a cohesive set that looks incredibly professional and well-thought-out.
-
Embrace Asymmetry: Don't be afraid to break the rules. A perfectly symmetrical design can be beautiful, but sometimes an asymmetrical one can be more interesting and unique. Place a charm off-center or use a varied pattern of beads to create a more organic, artistic feel.
By following these simple techniques, you'll be able to create spooky jewelry that not only reflects your personality but also looks like it was purchased from a high-end boutique. Our kits from Jewelry Made BY Me are designed with this in mind, including a variety of beads and charms to help you create a truly unique and professional-looking piece every time.

How Do I Take Care of My Homemade Spooky Jewelry?
You’ve put so much time and effort into creating your unique spooky jewelry, so naturally, you want it to last as long as possible. Proper care is key to ensuring your beaded bracelets and necklaces stay in great condition for many Halloweens to come. While handmade jewelry might not be as durable as fine jewelry, a few simple habits can extend its life and keep it looking new.
-
Avoid Exposure to Chemicals: This is the most important rule. Chemicals found in common products like lotions, perfumes, hairspray, and household cleaners can tarnish metal components, weaken the stringing material, and even damage the surface of certain beads. Make it a habit to put on your jewelry last, after you’ve applied all your other products.
-
Store It Properly: Don’t just toss your jewelry into a pile on your dresser. Storing it correctly prevents tangling and scratches.
-
Store your spooky jewelry in a separate jewelry box or a pouch to protect it from dust and other pieces that might scratch it.
-
Keep it in a cool, dry place away from direct sunlight, which can cause some beads to fade over time.
-
Be Gentle with It: Handmade jewelry is more delicate than a piece of commercial jewelry. Avoid tugging on your bracelet or necklace, and don't wear it while doing heavy physical activity, such as working out or gardening. The force of these activities can cause the stringing material to stretch or break.
-
Clean It Gently: If your jewelry starts to look a little dull, you can clean it gently.
-
Use a soft, dry cloth to wipe away any dirt or oils.
-
For a deeper clean, you can use a slightly damp cloth, but be sure to dry the piece completely afterward.
-
Avoid using harsh jewelry cleaners or abrasive materials, as they can damage the beads and charms.
By following these simple care instructions, your spooky jewelry will remain a favorite accessory for many Halloween seasons. A well-cared-for piece of handmade jewelry is a treasure that you can enjoy for years. Our DIY beaded bracelet kits are designed with high-quality materials, so with the right care, your creations will stand the test of time.
Conclusion: Your Spooky DIY Jewelry Journey Starts Now
Making your own spooky jewelry is more than just a craft; it's a way to express your creativity, celebrate the Halloween season, and create something truly unique. We’ve covered the essential questions, from what supplies you need to the best themes and how to care for your finished pieces. Whether you're a first-time crafter or a seasoned pro, the world of DIY spooky jewelry is full of exciting possibilities.
There’s no better feeling than wearing a piece of jewelry that you designed and made yourself. It's a statement piece that tells a story, and it's a source of pride. Now that you have all the answers, the only thing left to do is to start crafting!
Ready to start your spooky season creation? Shop our Halloween DIY beaded bracelet kits at Jewelry Made BY Me today! We have everything you need to bring your spooky vision to life, all in one convenient kit.
FAQ Section
Is making a beaded bracelet difficult for a beginner?
No, making a beaded bracelet is an excellent project for a beginner. The most common and easiest type is a stretch bracelet, which doesn't require complex tools or techniques like clasps. You only need a stretchy cord, beads, and scissors. Many kits, like those from Jewelry Made BY Me, provide all the necessary materials and simple, step-by-step instructions that make the process straightforward and fun. It's a low-barrier-to-entry craft that yields beautiful results with minimal effort.
How do I know how many beads I need for a bracelet?
The number of beads you need depends on the size of the beads and your wrist size. For an average adult bracelet, you'll typically need between 25 and 35 beads for a 7-inch bracelet, assuming a standard bead size of 6mm or 8mm. Our DIY kits are pre-portioned to provide the right amount of beads for a standard-sized bracelet, so you don't have to worry about counting or running out of supplies.
Can I use hot glue or super glue to secure my knots?
It is not recommended to use hot glue or super glue to secure your knots on a beaded bracelet. These types of adhesives can become brittle over time and cause the knot to break. They can also damage the stretchy cord, weakening its elasticity. The best way to secure your bracelet is by tying a strong surgeon's knot, which is known for its durability. If you're using a non-stretchy cord, you can use a small drop of a specialized jewelry glue designed for this purpose, but a well-tied knot is generally all that's needed.
What kind of beads are best for spooky jewelry?
The best beads for spooky jewelry are those that fit the theme and are durable. Look for beads made of materials like glass, acrylic, or natural stones such as onyx, hematite, or obsidian. You can also find beads in specific shapes like skulls, pumpkins, or spiders. The color and shape are more important than the material. Our Jewelry Made BY Me kits include a curated selection of high-quality beads that are both durable and perfectly themed for spooky creations.
How long does it take to make a beaded bracelet?
A simple beaded bracelet can be made very quickly, often in under 30 minutes. The total time depends on the complexity of your design and your experience level. Beginners might take a little longer as they get the hang of stringing the beads and tying the knot. The DIY process is more about enjoying the creative journey than it is about a quick finish time. With a curated kit, the process is streamlined, so you can spend more time on the fun part: designing and creating your unique piece.