The crisp autumn air, the scent of pumpkin spice, and the delightful chill of anticipation for Halloween – it's a magical time of year that beckons us to embrace all things spooky and fun. While costumes and candy often steal the spotlight, there's another wonderfully creative way to adorn yourself for the season: a custom-made spooky charm bracelet!
Imagine a unique accessory that perfectly captures the spirit of Halloween, from playful ghosts to whimsical pumpkins, all crafted by your own hands. It's not just a piece of jewelry; it's a statement, a conversation starter, and a testament to your personal style.
For many, the idea of "making Halloween jewelry" might sound intimidating, conjuring images of intricate tools, delicate wires, and years of practice. But here’s the wonderful truth: crafting a charming spooky bracelet, especially with a well-designed DIY kit, is incredibly accessible for beginners. You don't need a jewelry-making degree or a workshop full of specialized equipment. What you do need is a little guidance, a dash of creativity, and the right materials to bring your spooky vision to life.
This comprehensive guide is designed to take you by the hand and lead you through every thrilling step of creating your very first spooky charm bracelet. We’ll demystify the process, break down the components, and provide practical tips to ensure your crafting experience is not only successful but also genuinely enjoyable. So, whether you're planning for a Halloween party, looking for a unique gift, or simply want to indulge in a fun, festive craft, get ready to unleash your inner artisan and weave some spooky magic!
Getting Started: Preparing Your Crafting Space
Before you unleash your inner jewelry designer, it's wise to set up a dedicated, comfortable workspace. This isn't just about aesthetics; it's about making the process enjoyable and minimizing potential frustrations (like beads rolling off the table!).
-
Choose Your Surface: A clean, flat, and well-lit surface is ideal. A kitchen table, a sturdy desk, or even a craft mat spread over carpet can work. The key is stability.
-
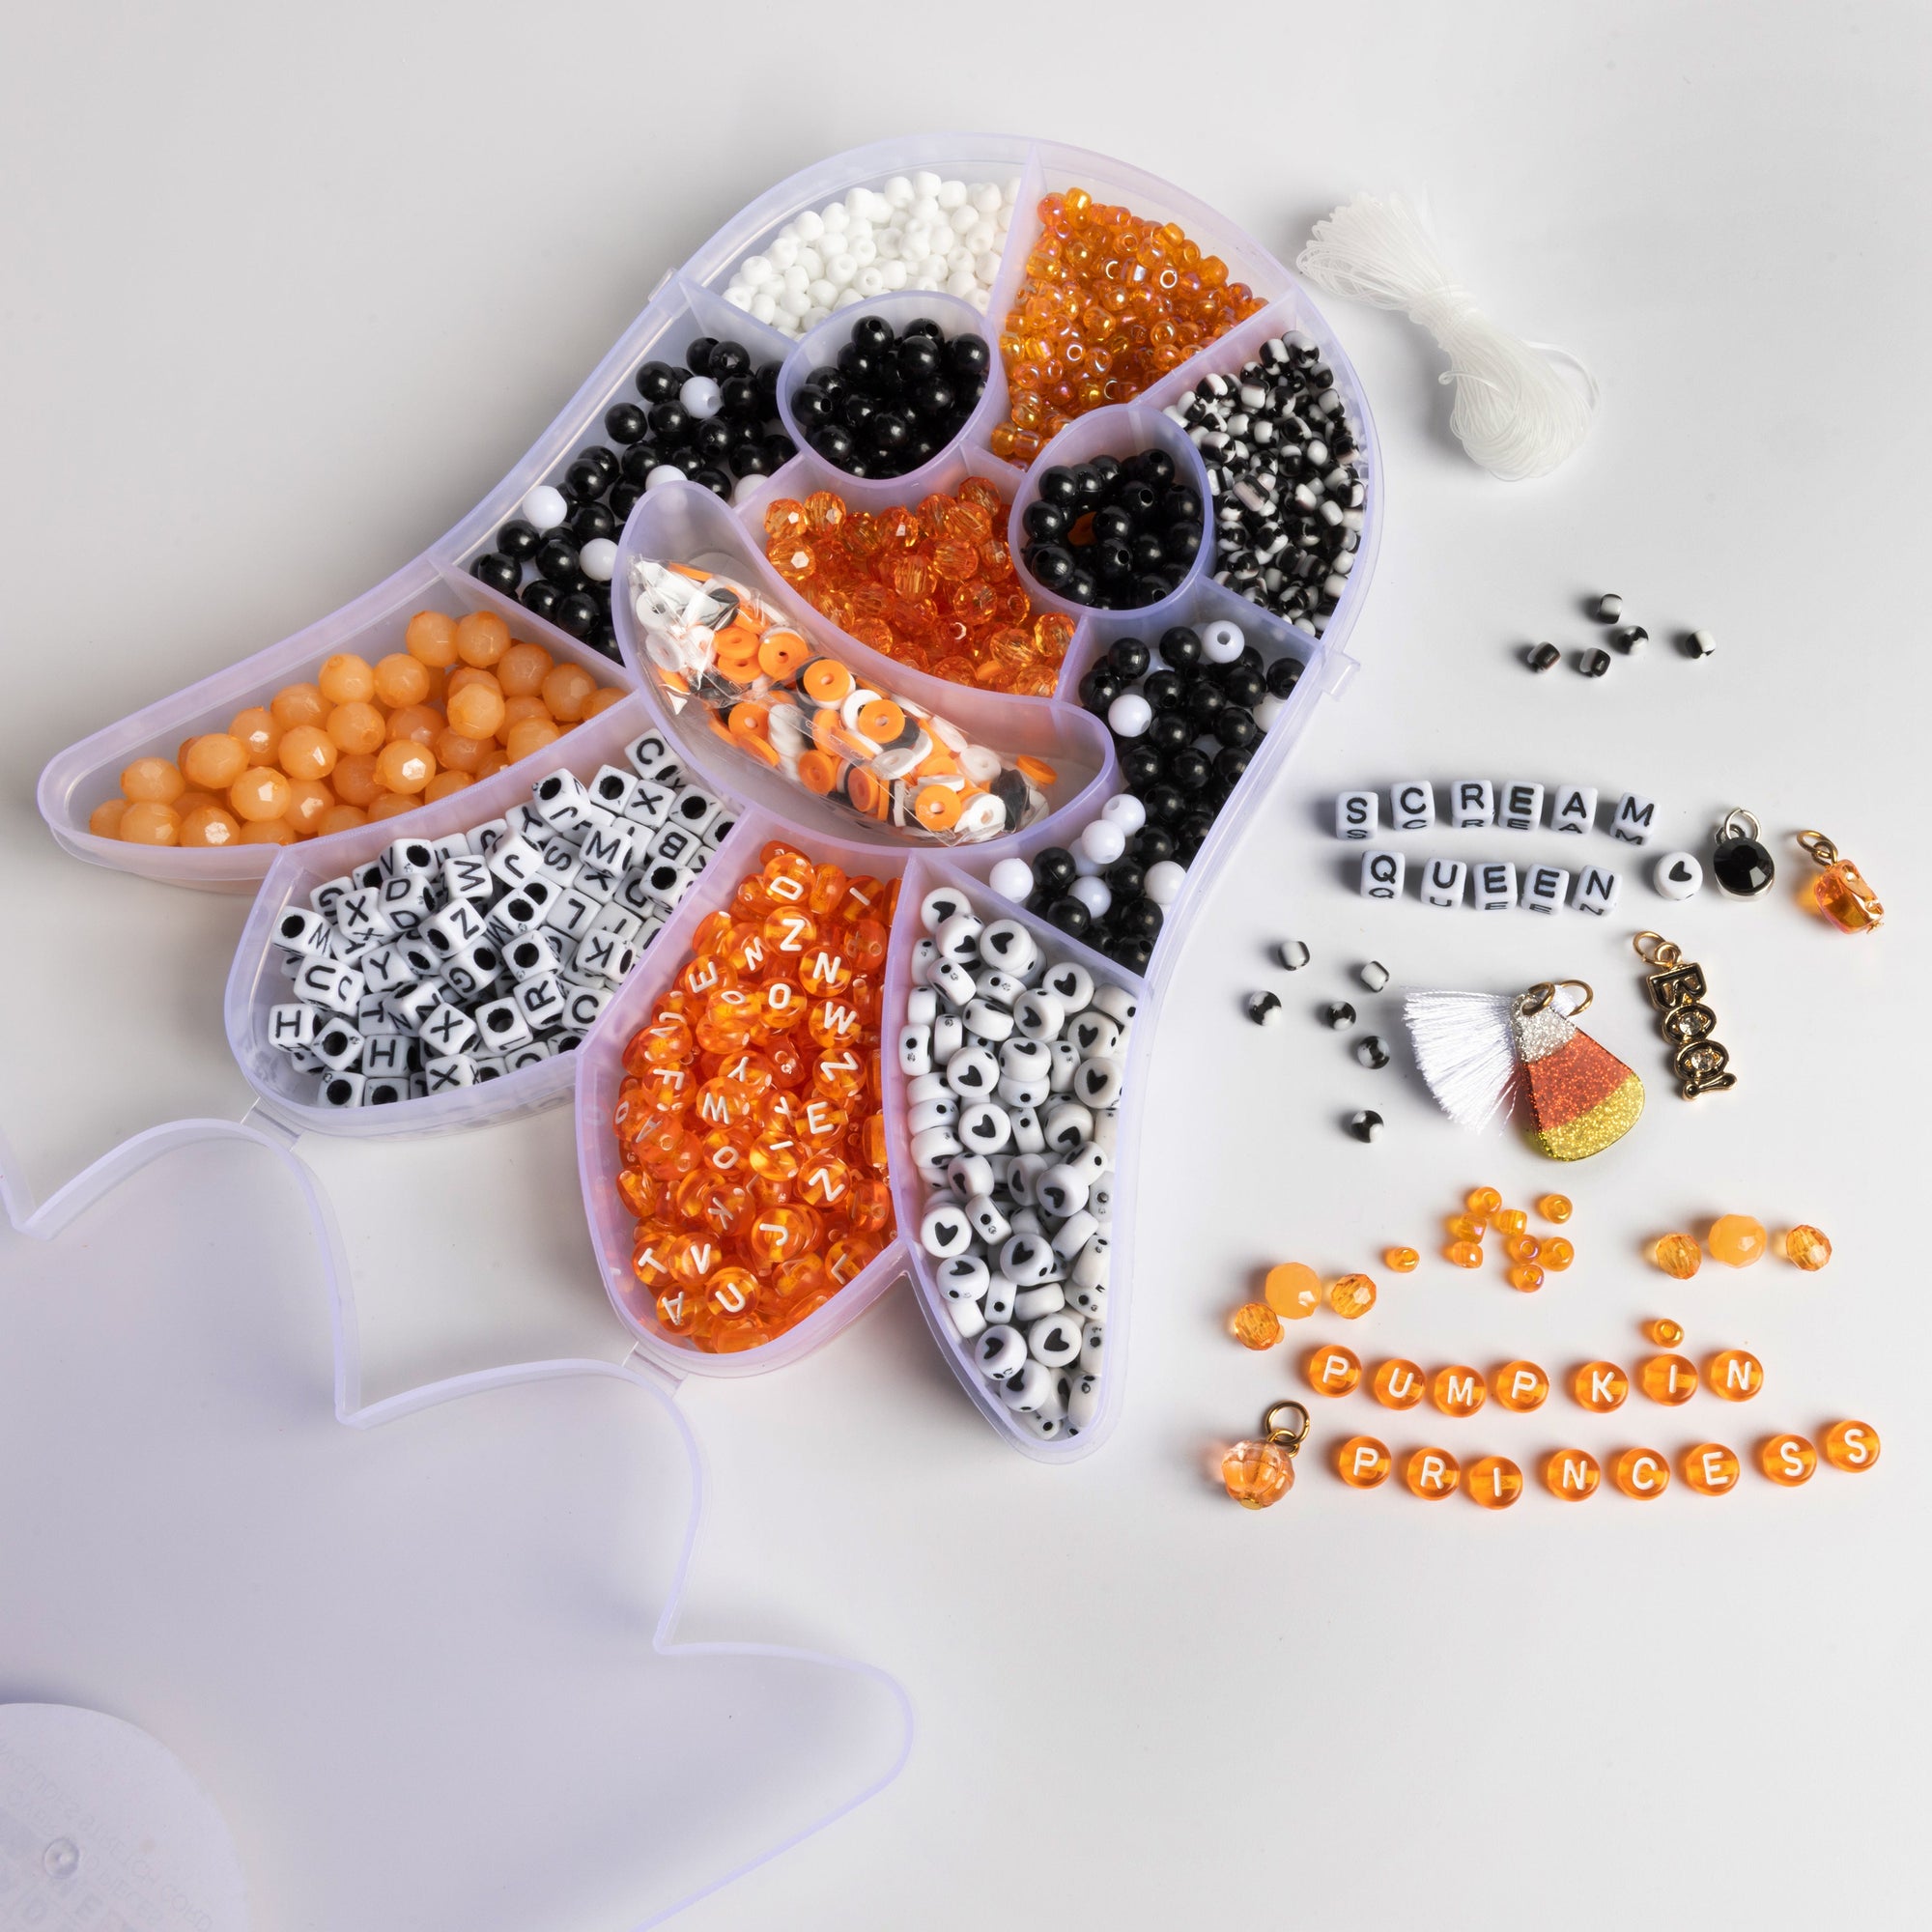
Contain Your Beads: This is crucial! Those tiny beads love to scatter. Your Jewelry Made By Me kit comes with an excellent ghost-shaped compartment box, which is perfect for keeping everything organized. If you're using loose beads, consider a bead tray, a shallow dish, or even a clean cookie sheet with a lip to prevent escapes.
-
Gather Your Tools (Minimal): For this project, you’ll mostly need your hands! However, a pair of small, sharp scissors to cut the elastic cord neatly will be very helpful. A ruler or measuring tape might be handy for consistent cord length, though not strictly necessary.
-
Good Lighting: Natural light is always best, but a bright desk lamp will ensure you can clearly see the bead holes and the details of your charms.
-
Comfort and Patience: Put on some spooky tunes, grab a warm drink, and prepare to relax and enjoy the process. Crafting should be fun, not a race!

Step-by-Step Guide: Crafting Your Spooky Charm Bracelet
Now for the fun part! Follow these steps to transform your bead kit into a unique spooky accessory.
Step 1: Planning Your Design
This is where your creativity truly shines! Don't just start stringing beads randomly. Lay out your beads and charms and experiment with different patterns and combinations.
-
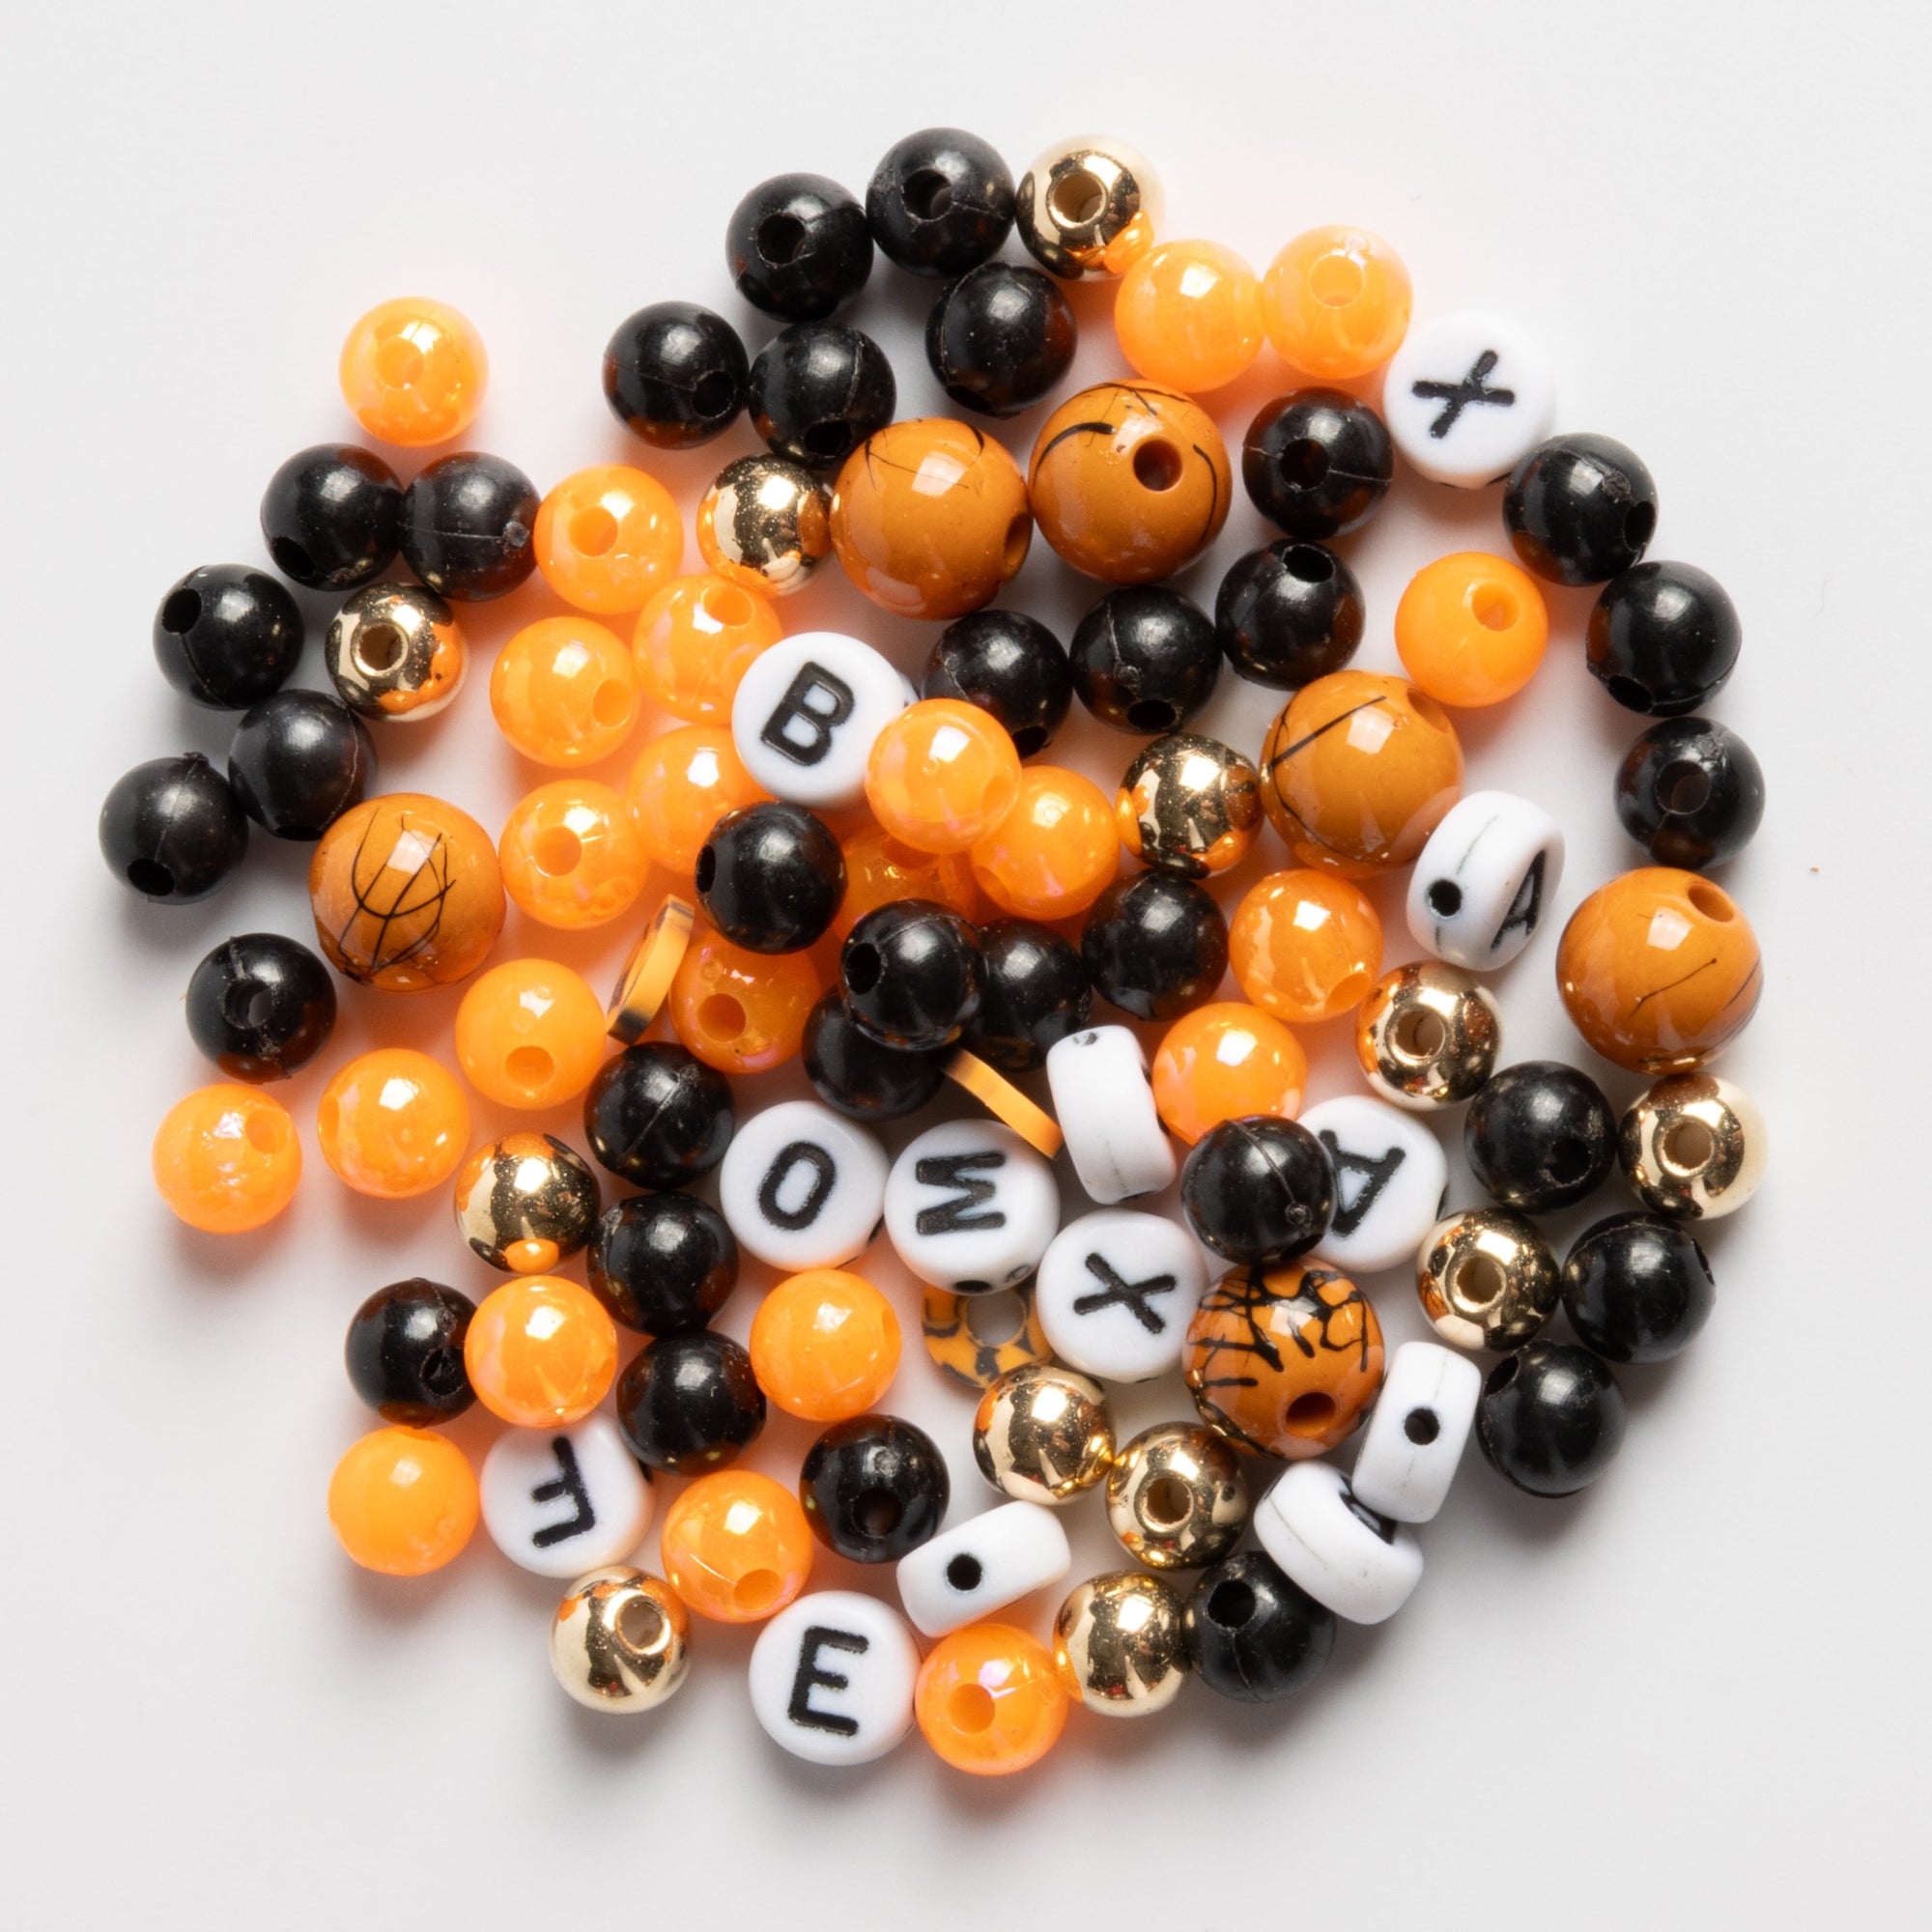
Theme Integration: Think about what kind of spooky story you want your bracelet to tell. Do you want it to be playful with ghosts and pumpkins, or a bit more mysterious with black and white motifs? The "Halloween Ghost Orange and Black Letter DIY Bead Box" offers a fantastic palette of black, white, and orange, along with an array of spooky charms.
-
Word Play: With white block letter beads and orange round alphabet beads, you can spell out fun Halloween words like "BOO," "SPOOKY," "GHOST," "FRIGHT," or even "WITCH." Consider your name or a friend's name if you're making it as a gift.
-
Color Balance: Use the black, white, and orange spacer beads to create visual interest. Alternate colors, or group similar colors together for a bolder statement.
-
Charm Placement: Decide where your charms will go. Do you want them all grouped together, or spaced out evenly among the beads? Consider putting a central charm at the very front of the bracelet, or distributing them symmetrically.
-
Bead Order: Try out different sequences. Maybe a pattern of small spacer, letter bead, small spacer, larger spacer, repeat. Or perhaps a vibrant section of orange heishi beads followed by a striking black crystal rondelle. The over 1800 pieces in your kit give you immense flexibility!
Pro Tip: Lay your beads and charms out on a bead mat or a soft cloth in the order you plan to string them. This visual representation helps you refine your design before committing. Take a picture of your favorite design before you start stringing, just in case you need to refer back to it.
Step 2: Measuring and Cutting Your Elastic Cord
The correct length of elastic cord is essential for a comfortable fit.
-
Measure Your Wrist: Wrap the elastic cord comfortably around your wrist. Don't pull it too tight, as you want the finished bracelet to have a little give.
-
Add Extra Length: This is crucial for tying the knot! Add at least 6-8 inches (15-20 cm) to your wrist measurement. This extra length provides ample room for tying secure knots without struggling. For example, if your wrist is 7 inches, cut a piece of cord about 13-15 inches long. The kit provides 5 yards, so you have plenty to experiment with!
-
Cut Neatly: Use your sharp scissors to make a clean cut. A jagged edge can make threading difficult.
Pro Tip: You can secure one end of your elastic cord with a piece of painter's tape to your work surface, or use a bead stopper, to prevent beads from sliding off as you string them.
Step 3: Stringing Your Beads and Charms
This is the meditative part of the process where your design starts to come to life.
-
Start Threading: Begin threading your beads and charms onto the elastic cord, following the design you planned in Step 1.
-
Consistency: Try to maintain a consistent tension as you string. Don't pull the cord too tight, but also don't let it be too loose.
-
Charm Attachment: Most charms in DIY kits will have a small loop at the top. Simply thread the elastic cord through this loop. If a charm has a jump ring (a small metal circle), you might need to open it slightly with small pliers (if available) to attach it to the elastic, or simply thread the elastic through the jump ring itself if the hole is large enough. The charms in the Jewelry Made By Me kit are designed to be easy to string directly onto the elastic.
-
Fill the Length: Continue adding beads and charms until the bracelet is long enough to comfortably wrap around your wrist, but without being stretched. Remember, the elastic provides stretch, so you want it to be slightly snug when un-stretched, otherwise it will be too loose. Try it on your wrist before tying the knot to check the fit.
Pro Tip: As you thread, occasionally hold the un-knotted end and let the beads settle. This helps you visualize the final drape and adjust your design as needed. Don't be afraid to unstring a few beads and re-arrange if you're not happy with the look!
Step 4: Tying a Secure Knot
This is the most critical step to ensure your bracelet doesn't fall apart. A good, strong knot is key.
-
The Surgeon's Knot (Recommended): This knot is excellent for elastic cord because it's designed to be very secure and minimize slipping.
-
Bring the two ends of the elastic cord together, crossing one over the other as if tying a regular shoelace knot.
-
Instead of just one loop, wrap the top end under and through the loop twice. This is the first half of the surgeon's knot. Pull gently to tighten, but don't pull it completely taut yet.
-
Now, make the second half of the knot: cross the ends again, but this time in the opposite direction (if you crossed right over left before, now cross left over right).
-
Again, wrap the top end under and through the loop twice.
-
Carefully pull both ends simultaneously and firmly, but not so hard that the cord snaps. You should feel the knot tighten and lock into place.
-
Optional but Recommended: Add a small dab of clear, quick-drying craft glue (like super glue or E6000) to the knot. Let it dry completely before proceeding. This step dramatically increases the knot's security.
-
Alternative: Square Knot with Extra Passes:
-
Tie a standard square knot: right over left, then left over right.
-
Before tightening the second half of the knot, pass one of the ends through the loop an additional time (so it goes through twice).
-
Pull firmly on both ends to tighten.
-
Again, a small dab of craft glue is highly recommended.
Pro Tip: While tightening the knot, gently stretch the bracelet away from the knot. This helps the knot snug up properly and ensures the elastic is evenly distributed.
Step 5: Finishing Touches
Almost there! Now, to make your bracelet look professional and last longer.
-
Trim Excess Cord: Once your knot is dry and secure (if you used glue, give it at least 15-30 minutes), use your sharp scissors to trim the excess elastic cord. Leave a very small tail, about 1-2 millimeters, right next to the knot. Don't cut it flush, as this can cause the knot to unravel over time.
-
Conceal the Knot (Optional but Nice): If you can, gently slide the knot inside one of the larger bead holes. This hides the knot and gives your bracelet a seamless, finished look. The larger spacer beads or even some of the letter beads in your kit might have a hole big enough for this.
-
Test the Stretch: Gently stretch your finished bracelet a few times to ensure the knot holds and the beads are securely in place. If anything feels loose, it’s better to re-tie the knot now than have it break later.

Tips for Success and Beyond
-
Patience is a Virtue: Don't rush the process. Enjoy each step, from planning to stringing. If you make a mistake, it's okay! Unstring and start again.
-
Experiment with Designs: Your "Halloween Ghost Orange and Black Letter DIY Bead Box" is packed with over 1800 pieces, offering countless design possibilities. Don't feel limited to just one bracelet. Make matching sets, layered bracelets, or even necklaces!
-
Gift-Giving: A handmade spooky charm bracelet makes an incredibly thoughtful and personal gift for friends, family, or fellow Halloween enthusiasts.
-
Care for Your Bracelet: To ensure your spooky creation lasts, avoid prolonged exposure to water (showering, swimming), harsh chemicals (perfumes, lotions), and extreme heat. Store it in a jewelry box or a soft pouch when not wearing it.
-
Community and Inspiration: Look for inspiration online! Websites like Pinterest, Instagram, and even YouTube are overflowing with bead jewelry ideas. Join online crafting communities to share your creations and learn from others.
Why Choose a DIY Bead Kit?
For beginners, DIY bead kits like the "Halloween Ghost Orange and Black Letter DIY Bead Box" from Jewelry Made By Me are an absolute game-changer. Here’s why they are superior to trying to source individual components:
-
Convenience: All the guesswork is removed. You don't have to wander through a craft store trying to figure out what goes with what. Everything you need, from beads to elastic, is curated and ready to go.
-
Color Coordination: The kits are thoughtfully designed with a cohesive color palette and theme. This ensures your finished product looks harmonious and professional, even if you're a complete novice. The black, white, and orange theme of this particular kit is classic Halloween perfection.
-
Cost-Effective: Often, buying a kit is more economical than purchasing individual strands of beads, charms, and elastic separately, especially if you only need a small quantity of each.
-
Variety and Quantity: Your Jewelry Made By Me kit boasts over 1800 pieces! This isn't just enough for one bracelet; it's enough for multiple projects, allowing you to experiment with various designs, create matching sets, or even make gifts for friends. The assortment of bead shapes (smooth round, seed bead, faceted crystal rondelle, polymer heishi) and charm types provides incredible versatility.
-
Guided Experience: While not all kits come with explicit instructions, the pre-selected nature of the components guides your choices and helps you understand how different elements work together.
-
Storage Solution: The adorable ghost-shaped storage compartment box is not just cute; it's incredibly practical. It keeps all your precious beads and charms organized, preventing spills and making clean-up a breeze. This thoughtful inclusion means you can easily store any leftover components for future crafting endeavors.
In essence, a DIY bead kit streamlines the creative process, allowing you to focus on the joy of making rather than the challenge of sourcing materials. It’s the perfect entry point into the rewarding world of jewelry crafting.
Conclusion: Embrace Your Inner Spooktacular Creator!
Crafting your first spooky charm bracelet is more than just a craft project; it's an opportunity to express your creativity, de-stress, and create a truly unique accessory that celebrates the magic of the Halloween season. With the right tools (or rather, the right kit!) and a little patience, anyone can create a beautiful, personalized piece of jewelry that will garner compliments and spread festive cheer.
From selecting your favorite ghost charm to spelling out a witty Halloween word with letter beads, every step in the process is a chance to infuse your personality into your creation. And the best part? The sense of accomplishment you'll feel wearing a bracelet you made yourself is truly unmatched.
So, why wait? This Halloween, bypass the mass-produced accessories and adorn your wrist with a piece of art that tells your spooky story. Whether it's for trick-or-treating, a costume party, or just adding a touch of festive flair to your everyday attire, your handmade spooky charm bracelet will be a source of pride and delight.
Ready to conjure your own unique Halloween accessory?
Unleash your creativity and get everything you need to start crafting your enchanting Halloween charm bracelet today! Shop our fantastic selection of DIY Halloween beaded bracelet kits at Jewelry Made By Me. Our kits are packed with all the spooky beads and charms you could ever wish for, making your crafting journey as fun as it is effortless. Click here to discover your next hauntingly good project!
Frequently Asked Questions (FAQs) About Crafting Spooky Charm Bracelets
Q1: What comes in the "Halloween Ghost Orange and Black Letter DIY Bead Box" from Jewelry Made By Me?
The Halloween Ghost Orange and Black Letter DIY Bead Box is a comprehensive kit designed for beginners. It includes everything you need to create custom stretch word beaded bracelets: white block letter beads, orange round alphabet beads, a diverse mix of black, white, and orange spacer beads (like smooth round, seed bead, faceted crystal rondelle, and polymer heishi), 5 yards of clear stretch elastic cord, and a variety of assorted enamel, glass, plastic, and tassel Halloween charms. Plus, it all comes neatly organized in an adorable ghost-shaped storage compartment box. In total, you'll find over 1800 pieces in the kit!
Q2: Is this DIY bead kit suitable for someone who has never made jewelry before?
Absolutely! This kit is specifically designed with beginners in mind. The comprehensive nature of the kit means all the necessary components are pre-selected and color-coordinated, eliminating the guesswork. The process involves simple stringing and knot-tying, which is easy to learn with a step-by-step guide. You don't need any prior experience or specialized tools to create a beautiful, spooky charm bracelet.
Q3: How long does it take to make one spooky charm bracelet?
The time it takes can vary depending on your design complexity and how quickly you work. For a beginner, the planning and stringing of a single bracelet might take anywhere from 30 minutes to an hour. The key is to enjoy the process and not rush. Since the kit contains over 1800 pieces, you'll have enough materials to make multiple bracelets, allowing you to get faster and more creative with each one!
Q4: What type of knot is best for securing elastic cord bracelets?
For elastic cord bracelets, a Surgeon's Knot is highly recommended because of its security and minimal slippage. It involves wrapping the cord ends around each other twice in each half of the knot. After tying, we strongly suggest adding a small dab of clear, quick-drying craft glue (like super glue or E6000) to the knot for extra durability. This helps prevent the knot from unraveling over time.
Q5: Can I make personalized word bracelets with this kit?
Yes, definitely! The Halloween Ghost Orange and Black Letter DIY Bead Box includes both white block letter beads and orange round alphabet beads.This allows you to spell out names, fun Halloween words like "BOO," "SPOOKY," "WITCH," or any other custom message you can imagine, making your bracelets truly unique and personalized.
Q6: How do I ensure my bracelet fits comfortably?
To ensure a comfortable fit, measure the elastic cord around your wrist first, but don't pull it too tight. Then, add at least 6-8 inches (15-20 cm) of extra length to that measurement before cutting the cord. This extra length is essential for comfortably tying a secure knot. When stringing, make sure the beads fit snugly but not overly tight on the un-stretched cord, as the elastic will provide the necessary stretch for wearing.
Q7: What are some tips for making my spooky charm bracelet last longer?
To extend the life of your handmade bracelet, avoid prolonged exposure to water (like showering or swimming), harsh chemicals (such as perfumes, lotions, or cleaning products), and extreme heat.When you're not wearing it, store your bracelet in a jewelry box or a soft pouch to protect it from dust and scratches. These simple care tips will help keep your spooky creation looking great for many Halloween seasons to come!