As Valentine's Day approaches, creating a heartfelt gift can express your love in a unique and personal way. Handmade bracelets are a fantastic option, allowing you to tailor each piece to the recipient's preferences. In this article, we'll dive into the top five beading techniques for crafting stunning Valentine's Day bracelets. These techniques are perfect for both beginners and experienced artisans looking to enhance their craft.
1. Stringing Technique
Stringing is perhaps the most straightforward technique and a great starting point for beginners. This method involves threading beads onto a stringing material such as wire, elastic, or nylon thread. The simplicity of this technique makes it highly versatile, allowing for endless creativity in design and pattern.
Materials Needed
- Beads of your choice
- Stringing material (wire, elastic, or nylon thread)
- Crimp beads or knots (to secure the ends)
- Clasps
Choosing the Right Beads
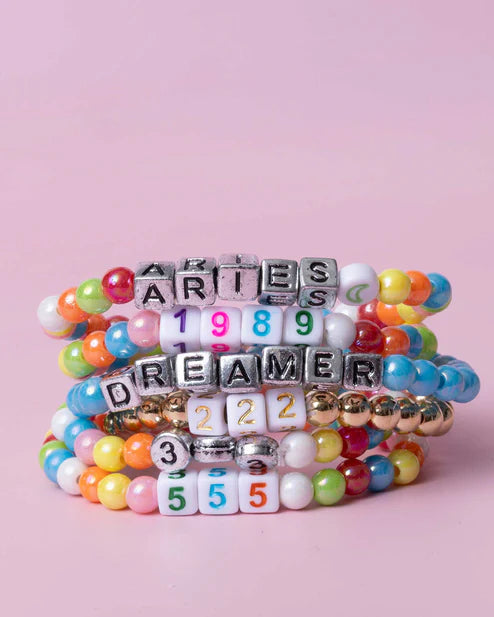
Selecting the right beads is crucial to achieving the desired aesthetic for your bracelet. Beads come in various shapes, sizes, and materials, from glass and wood to semi-precious stones. For a Valentine's theme, consider using heart-shaped beads, red and pink hues, or even letter beads to spell out a meaningful word or phrase.
Selecting the Stringing Material
The choice of stringing material can affect both the look and durability of the bracelet. Elastic is excellent for stretch bracelets that are easy to put on and take off, while wire provides a more structured form. Nylon thread offers flexibility and is ideal for intricate designs.
Securing Your Design
Properly securing your bracelet ensures its longevity. Crimp beads are small metal beads that, when flattened with pliers, hold the stringing material firmly in place. For those using knots, ensure they are tight and secure, adding a dab of glue for extra hold if necessary.
Steps to Follow
- Select Your Beads: Choose beads that reflect the recipient's taste. Consider using heart-shaped beads for a Valentine's theme.
- Measure Your String: Cut a length of string approximately 6 inches longer than your desired bracelet length.
- String Your Beads: Thread your chosen beads onto the string, experimenting with color patterns and designs.
- Secure the Ends: Use crimp beads or tie knots to secure the beads in place, and attach a clasp for easy wear.

2. Loom Beading
Loom beading offers intricate designs that can be customized with a variety of colors and patterns. This technique requires a bit more setup but is ideal for making detailed and visually striking bracelets.
Materials Needed
- Beads (uniform size)
- Beading loom
- Thread (nylon or specialized beading thread)
- Needle
Understanding the Beading Loom
A beading loom is a tool that allows you to create woven bead designs efficiently. It holds the warp threads taut, making it easier to weave in the weft threads. There are various types of looms, from small handheld versions to large adjustable ones, each suited for different project sizes.
Choosing Your Beads and Thread
For loom beading, uniform bead size is crucial to achieving a neat and even design. Delica or seed beads are popular choices due to their consistency. The thread should be strong and durable, with nylon or specialized beading thread being preferred for their strength and flexibility.
Designing Your Pattern
Creating a pattern is an essential step in loom beading. You can sketch your design on graph paper or use digital beading software for more complex patterns. Consider incorporating Valentine's motifs like hearts or love symbols to personalize your bracelet further.
Steps to Follow
- Set Up Your Loom: Follow the instructions for your specific loom to set up the warp threads.
- Design Your Pattern: Sketch out your design on graph paper or use pre-existing patterns.
- Weave Your Beads: Thread the needle and pass it through a row of beads, then weave it under and over the warp threads.
- Secure the Ends: Carefully remove the bracelet from the loom, tying off the ends securely.
3. Peyote Stitch
The peyote stitch is a popular beading technique known for its versatility and unique woven appearance. It's perfect for creating flat, tubular, or even circular designs.
Materials Needed
- Cylinder beads (like Delicas)
- Beading thread
- Beading needle
Understanding Peyote Stitch Variations
Peyote stitch comes in several variations, including even-count, odd-count, and tubular peyote. Each type offers different possibilities in terms of design complexity and structure. Even-count peyote is often recommended for beginners due to its straightforward pattern.
Selecting Your Beads and Thread
The choice of beads significantly impacts the final look of your peyote stitch bracelet. Delica beads are a popular choice due to their uniformity and wide range of colors. The thread should be thin yet strong, allowing for multiple passes through each bead.
Creating Patterns and Designs
The unique structure of the peyote stitch allows for creative patterning. Consider experimenting with geometric shapes, gradients, or even pictorial designs. Using a beading graph paper can help you visualize and plan your design before starting.
Steps to Follow
- Start Your Base Row: String an even number of beads and create a loop by tying a knot.
- Add Rows: Pick up a bead, skip one bead in the previous row, and pass the needle through the next bead. Continue this pattern.
- Create Desired Length: Repeat the process, adding rows until you reach the desired bracelet length.
- Finish Off: Secure the ends and add a clasp.
4. Right Angle Weave
The right angle weave is another versatile technique that creates a lattice-like structure. This method is excellent for incorporating multiple bead sizes and shapes, allowing for a truly customized piece.
Materials Needed
- Various sizes of beads
- Beading thread
- Needle
Exploring the Right Angle Weave Structure
The right angle weave is characterized by its grid-like pattern, with each unit consisting of four beads forming a square. This structure is not only visually appealing but also offers great flexibility in design, allowing for various shapes and forms.
Choosing Beads and Thread
Mixing different bead sizes and shapes can add dimension and interest to your right angle weave bracelet. Larger beads can serve as focal points, while smaller beads can fill in the gaps. The thread should be durable and capable of multiple passes through each bead.
Enhancing Your Design
Once you have mastered the basic right angle weave, consider embellishing your design. You can add layers by weaving additional beads into the structure or incorporate charms and pendants for added flair.
Steps to Follow
- Create a Base: String four beads and form a loop, creating a square.
- Add More Squares: Continue adding beads in sets of four, creating interlocking squares.
- Expand Your Design: Adjust your pattern as desired, adding more rows or columns.
- Secure the Ends: Tie off the ends and attach a clasp.

5. Macramé
Macramé involves knotting cords in patterns to create a textured bracelet. This technique is perfect for those who enjoy working with threads and cords rather than beads alone.
Materials Needed
- Cord or thread (such as hemp or waxed cotton)
- Beads (optional, for embellishment)
- Scissors
Understanding Macramé Knots
Macramé employs various knotting techniques to create intricate patterns. Basic knots include the square knot, spiral knot, and lark's head knot. Each knot offers a different texture and appearance, allowing for diverse design possibilities.
Choosing the Right Cord
The choice of cord is crucial in macramé, affecting both the bracelet's look and feel. Hemp and waxed cotton are popular choices due to their durability and natural appearance. Choose a cord color that complements the intended design and any beads you plan to incorporate.
Adding Beads and Embellishments
While macramé can be beautiful on its own, adding beads between knots can enhance the design. Consider using beads that align with a Valentine's theme, such as those in red or pink hues, or even heart-shaped beads for added sentiment.
Steps to Follow
- Cut Your Cord: Cut several lengths of cord, ensuring they are longer than your desired bracelet length.
- Create a Base Knot: Use a clip or tape to hold the cords in place, then tie a knot to create a base.
- Form Patterns: Use techniques like square knots or spiral knots to create your bracelet.
- Add Beads (Optional): Incorporate beads between knots for added flair.
- Finish Off: Secure the end with a knot and trim any excess cord.
Conclusion
Creating a handmade bracelet for Valentine's Day is a meaningful way to show your affection. Each of these beading techniques offers unique benefits and styles, allowing you to craft a piece that is both beautiful and personal. Whether you're a beginner or a seasoned crafter, these methods provide a fantastic opportunity to express creativity and sentiment through your work. Gather your materials, choose your favorite technique, and start crafting a bracelet that will surely be cherished.
Personalization and Creativity
Personalizing your bracelet adds an extra layer of thoughtfulness. Consider incorporating the recipient's favorite colors, initials, or symbols that hold special meaning. This personalized touch makes the bracelet more than just an accessory—it becomes a cherished keepsake.
Tips for Success
Patience and practice are key to mastering beading techniques. Start with simpler designs and gradually work your way up to more complex patterns as you gain confidence. Don't be afraid to experiment with different materials and styles to find what works best for you.
Sharing Your Craft
Consider sharing your creations with others, either as gifts or through social media platforms. This not only spreads the joy of handmade gifts but also allows you to connect with a community of fellow crafters. Sharing your progress and finished pieces can inspire others and provide valuable feedback for future projects.
Shop Jewelry Made By Me for Your DIY Bead Jewelry Kit!
Ready to start your beading journey? Visit Jewelry Made By Me to find the perfect DIY bead jewelry kit! Our kits come with everything you need to create stunning bracelets, including a variety of beads, durable thread, and easy-to-follow instructions. Unleash your creativity and craft beautiful, personalized pieces that you can cherish or gift to loved ones. Don't wait—shop now and let your imagination shine!


