Creating personalized keepsakes for your baby is a beautiful way to cherish those early moments that pass all too quickly. One of the most versatile and visually stunning methods to preserve these memories is through resin crafts. In this article, we'll explore various DIY baby keepsake resin ideas that you can easily create at home. Whether you're a seasoned crafter or a beginner, you'll find something here to commemorate your baby's milestones and special moments.
Why Choose Resin for Baby Keepsakes?

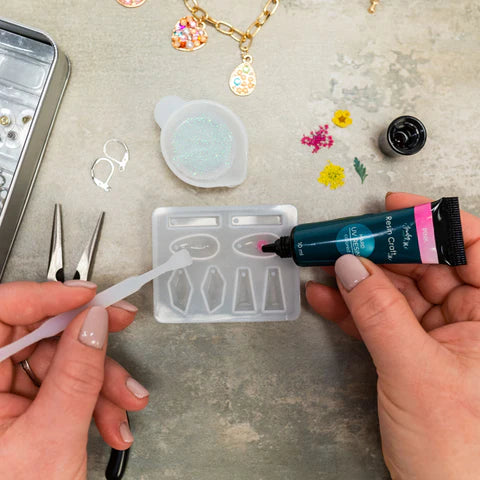
Resin is a durable and clear medium that beautifully encases and preserves items for years to come. It provides a glossy, professional finish that highlights the details of the keepsake. Here are some reasons why resin is an excellent choice for baby keepsakes:
- Longevity: Resin is highly durable and resistant to yellowing, ensuring your keepsakes last a lifetime.
- Versatility: You can embed a variety of items like baby clothes, shoes, first hair locks, and more.
- Aesthetic Appeal: The glossy finish of resin adds a professional and polished look to your keepsakes.
Essential Supplies for Resin Crafting
Before diving into specific project ideas, it's crucial to gather all the necessary supplies. Here's a checklist to get you started:
- Epoxy Resin and Hardener: Ensure you buy a high-quality, clear resin.
- Mixing Cups and Sticks: For mixing the resin and hardener.
- Silicone Molds: Available in various shapes and sizes.
- Protective Gear: Gloves and a mask to protect yourself from fumes.
- Embedding Objects: Baby items you wish to preserve.
- Heat Gun or Torch: To remove bubbles from the resin.
- Sandpaper and Polishing Kit: For finishing touches.
DIY Baby Keepsake Resin Ideas
Baby's First Hair Lock
One of the simplest yet most sentimental keepsakes you can create is a resin piece featuring your baby's first hair lock. Here’s how to do it:
- Prepare the Mold: Choose a small mold, such as a heart or circle.
- Mix the Resin: Follow the instructions on your resin kit to mix the epoxy and hardener.
- Pour the Base Layer: Pour a thin layer of resin into the mold and let it sit for a few minutes.
- Place the Hair Lock: Carefully place the hair lock onto the base layer.
- Add More Resin: Pour another layer of resin to cover the hair lock completely.
- Remove Bubbles: Use a heat gun to eliminate any bubbles.
- Cure and Finish: Allow the resin to cure as per the instructions, then sand and polish for a smooth finish.
Hand and Footprint Plaques
Creating a plaque with your baby's hand or footprint is a classic keepsake idea that never goes out of style. Here’s how you can make one using resin:
- Capture the Print: Use non-toxic ink to capture your baby’s hand or footprint on paper.
- Prepare the Mold: Choose a plaque-shaped mold.
- Mix and Pour Resin: Mix the resin and pour a base layer into the mold.
- Place the Print: Once the base layer is semi-cured, place the paper with the print face up.
- Seal with Resin: Pour another layer of resin to encapsulate the print.
- Remove Bubbles: Use a heat gun to remove any bubbles.
- Cure and Finish: Let the resin cure completely, then sand and polish.
Baby's First Shoes
Preserving your baby’s first pair of shoes in resin makes for an incredibly unique and heartwarming keepsake. Here’s a step-by-step guide:
- Prepare the Shoes: Clean and dry the shoes thoroughly.
- Choose a Deep Mold: Opt for a mold that can accommodate the shoes.
- Mix the Resin: Follow the mixing instructions carefully.
- Pour a Base Layer: Pour a thin layer of resin into the mold.
- Place the Shoes: Position the shoes in the resin, ensuring they are fully covered.
- Add More Resin: Pour additional resin to cover the shoes completely.
- Remove Bubbles: Use a heat gun or torch to eliminate bubbles.
- Cure and Finish: Allow ample curing time, then sand and polish the final piece.
Personalized Name Plaques
Creating a name plaque with resin is a fantastic way to personalize your baby’s nursery. Here’s how to create one:
- Choose a Mold: Select a mold in the shape of a plaque or your baby’s name.
- Prepare the Resin: Mix the resin and hardener according to the instructions.
- Add Decorations: Incorporate glitter, small toys, or dried flowers into the resin.
- Pour the Resin: Pour the mixture into the mold.
- Embed Letters: Place alphabet letters or a nameplate into the resin.
- Remove Bubbles: Use a heat gun to remove any bubbles.
- Cure and Finish: Let it cure, then sand and polish.

Tips for Working with Resin
Safety First
Always work in a well-ventilated area and wear protective gear. Resin fumes can be harmful, so it's crucial to follow safety guidelines.
Measure Accurately
Accurate measurement of resin and hardener is critical for a successful project. Improper ratios can result in resin that doesn’t cure properly.
Patience is Key
Resin projects require time for curing. Rushing the process can lead to imperfections. Follow the curing times specified in your resin kit instructions.
Final Thoughts
DIY baby keepsake resin crafts are a wonderful way to capture and preserve the fleeting moments of your baby's early years. From hair locks to tiny shoes, these projects allow you to create beautiful, personalized keepsakes that will be treasured for a lifetime. With the right supplies and a bit of creativity, you can craft stunning resin pieces that encapsulate your baby's precious moments forever.
So why wait? Gather your supplies and start crafting today. You'll be creating beautiful mementos that you and your family will cherish for years to come.
Shop for Your DIY Resin Kits
Ready to embark on your
? Look no further than Jewelry Made By Me for all your resin kit needs. With a wide selection of high-quality epoxy resins, molds, and essential supplies, you'll have everything you need to create stunning baby keepsakes that preserve those special moments. Don’t miss out on the chance to unleash your creativity—explore our kits today and start making beautiful, personalized treasures that will last a lifetime! Visit Jewelry Made By Me and let the crafting begin!


